How to Make Articulated Angel Wings Easy
Tutorial : Crafting articulated wings
Materials and tools used :
Matérials
- Backpack -
- Wood and plywood -
- Bolts and nuts - https://amzn.to/2QEKBcB
- Washers - https://amzn.to/2P0RQee
- Self locked nuts - https://amzn.to/3n0T05Y
- Minor pulleys - https://amzn.to/3n29XgH
- Center shape screws - https://amzn.to/3n8oeIz
- Wood screws - https://amzn.to/3x8EvSs
- Condom spiral spacers - https://amzn.to/3dv9pfP
- Heavy duty string - https://amzn.to/3v4DDwo
- Hot mucilage - https://amzn.to/3dsTGhw
- Foam sheets - https://amzn.to/3gph1me
- Forest skewers - https://amzn.to/3ejm5pg
- Plasti DIP undercoating - https://amzn.to/2ROvGx1
- Acrylic pigment - https://amzn.to/32wx1KZ
Tools
- Hot mucilage gun - https://amzn.to/3sG2e9j
- Hacksaw - https://amzn.to/3aqTRrP
- Drill press - https://amzn.to/3goiIQE
- Screwdrivers - https://amzn.to/3x5ipQK
Some links in this postal service are function of the Amazon Affiliate Program.
Define the need
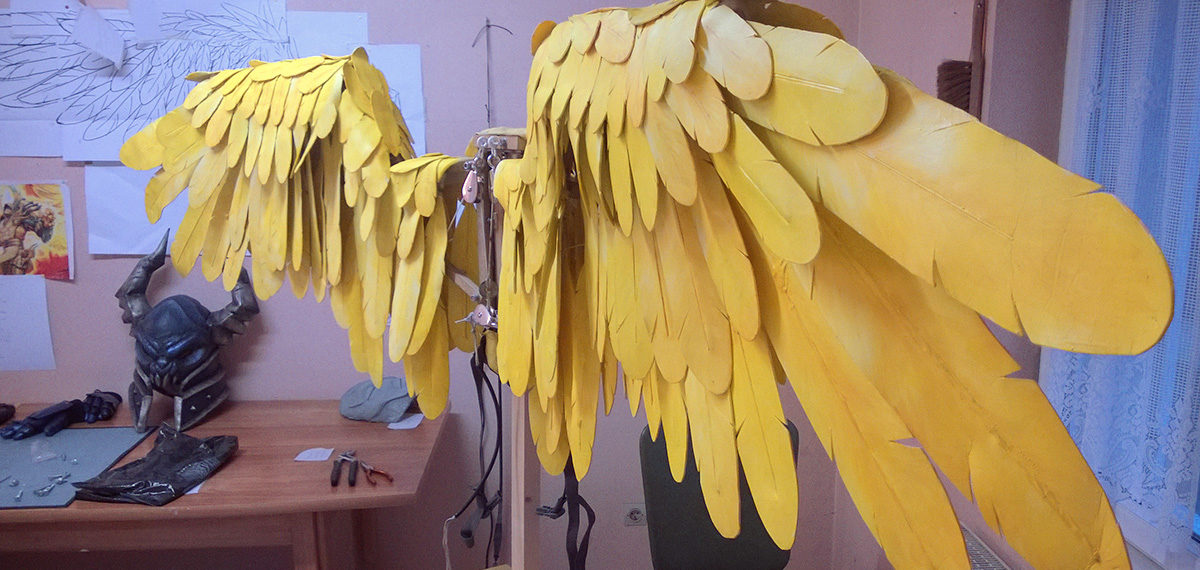
To build my Guardian of Kings costume, I HAD to have wings; and for good measure, they HAD to open up.
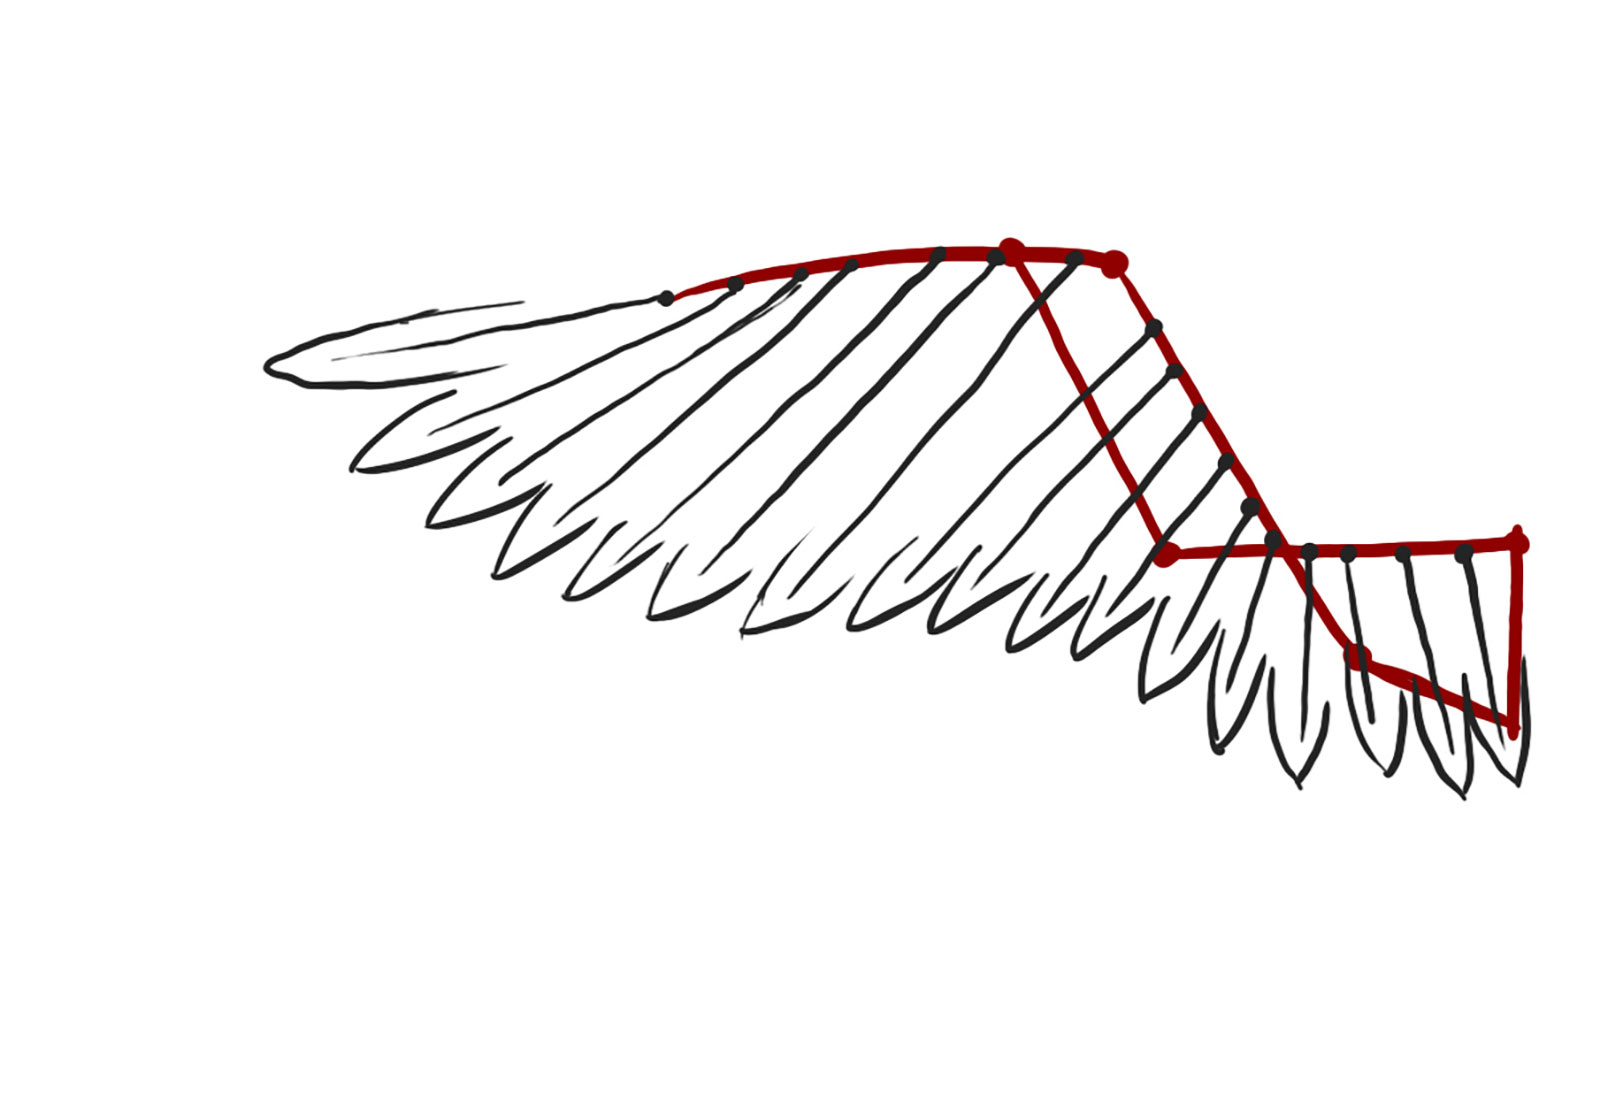
The biggest challenge was to give a "Woah" effect to the costume, like a peacock showing off his plume. To achieve that, the motion of the machinery imitates a existent eagle wing, which looks pretty shut to what people picture show in their caput when they remember about affections wings.
I had the choice to automate the wings so they would open with a remote trigger or create a system to open them past hand.
Automated systems
For automated systems, there were two possibilities: use electrical motors or a pneumatic system.
Electrical motors allow for full command over the speed of the wings equally well every bit different angles while opening the wings to give a natural feeling of a bird motion.
The main drawback of this solution is the combined weight of motors, batteries and all the steel elements used in the system. If the wings were the simply prop on the costume it would have been okay-ish, but if you add to this a full armor and a sword, it becomes a fleck also heavy to wear.
The pneumatic system on the other hand allows for a quick opening of the wings. The portability and autonomy of the organisation are rather good. But the required pieces were hard to observe, so they would non have been inexpensive for me. Additionally I had my doubts that the security checks would permit me through while I had air tanks fastened to my waist.
Because no automatic solution was good enough, I went to come across what was possible on the side of manual systems.
Manual systems
I rapidly realized that with a manual system, all you need is figure out 1 affair: which ane of your joints will power up your bully invention!
Generally the most applied solution is to employ an arm, preferably a costless 1. Of form it would exist possible to use a leg, a foot, your neck and then on, but that would be looking for problem!
In my example, I wanted a length of course small-scale enough so I didn't accept to motility my arm as well far to open the wings. For this, I drew an unfolding mechanism and attached a cord and pulleys to it. And at that place I have to exist honest and admit that I got very lucky: the course was about perfectly right at the commencement try :p .
Enquiry, drawings and prototypes
Before building our wing, we accept to figure out what we're building.
In the beginning, a pivot/slide arrangement seemed like a good solution, but the practical build of this would have been quite the difficult job. To be certain not to mess upwards, I cut some paper-thin pieces and put them together with metal wire.
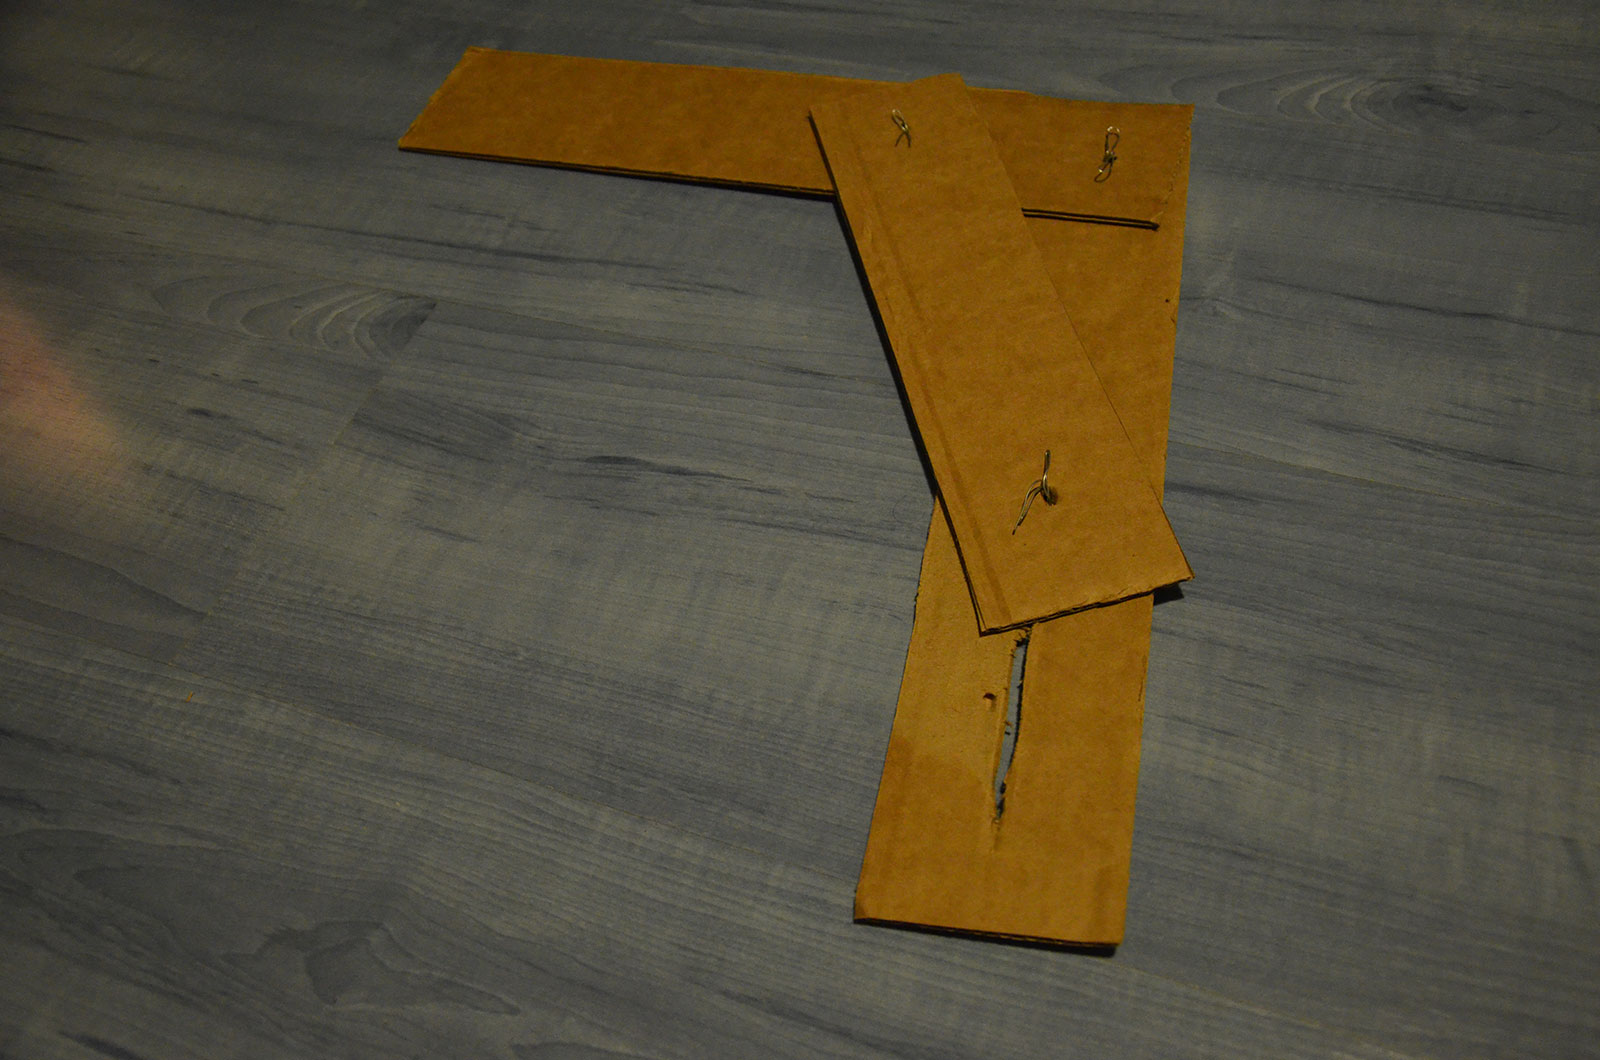
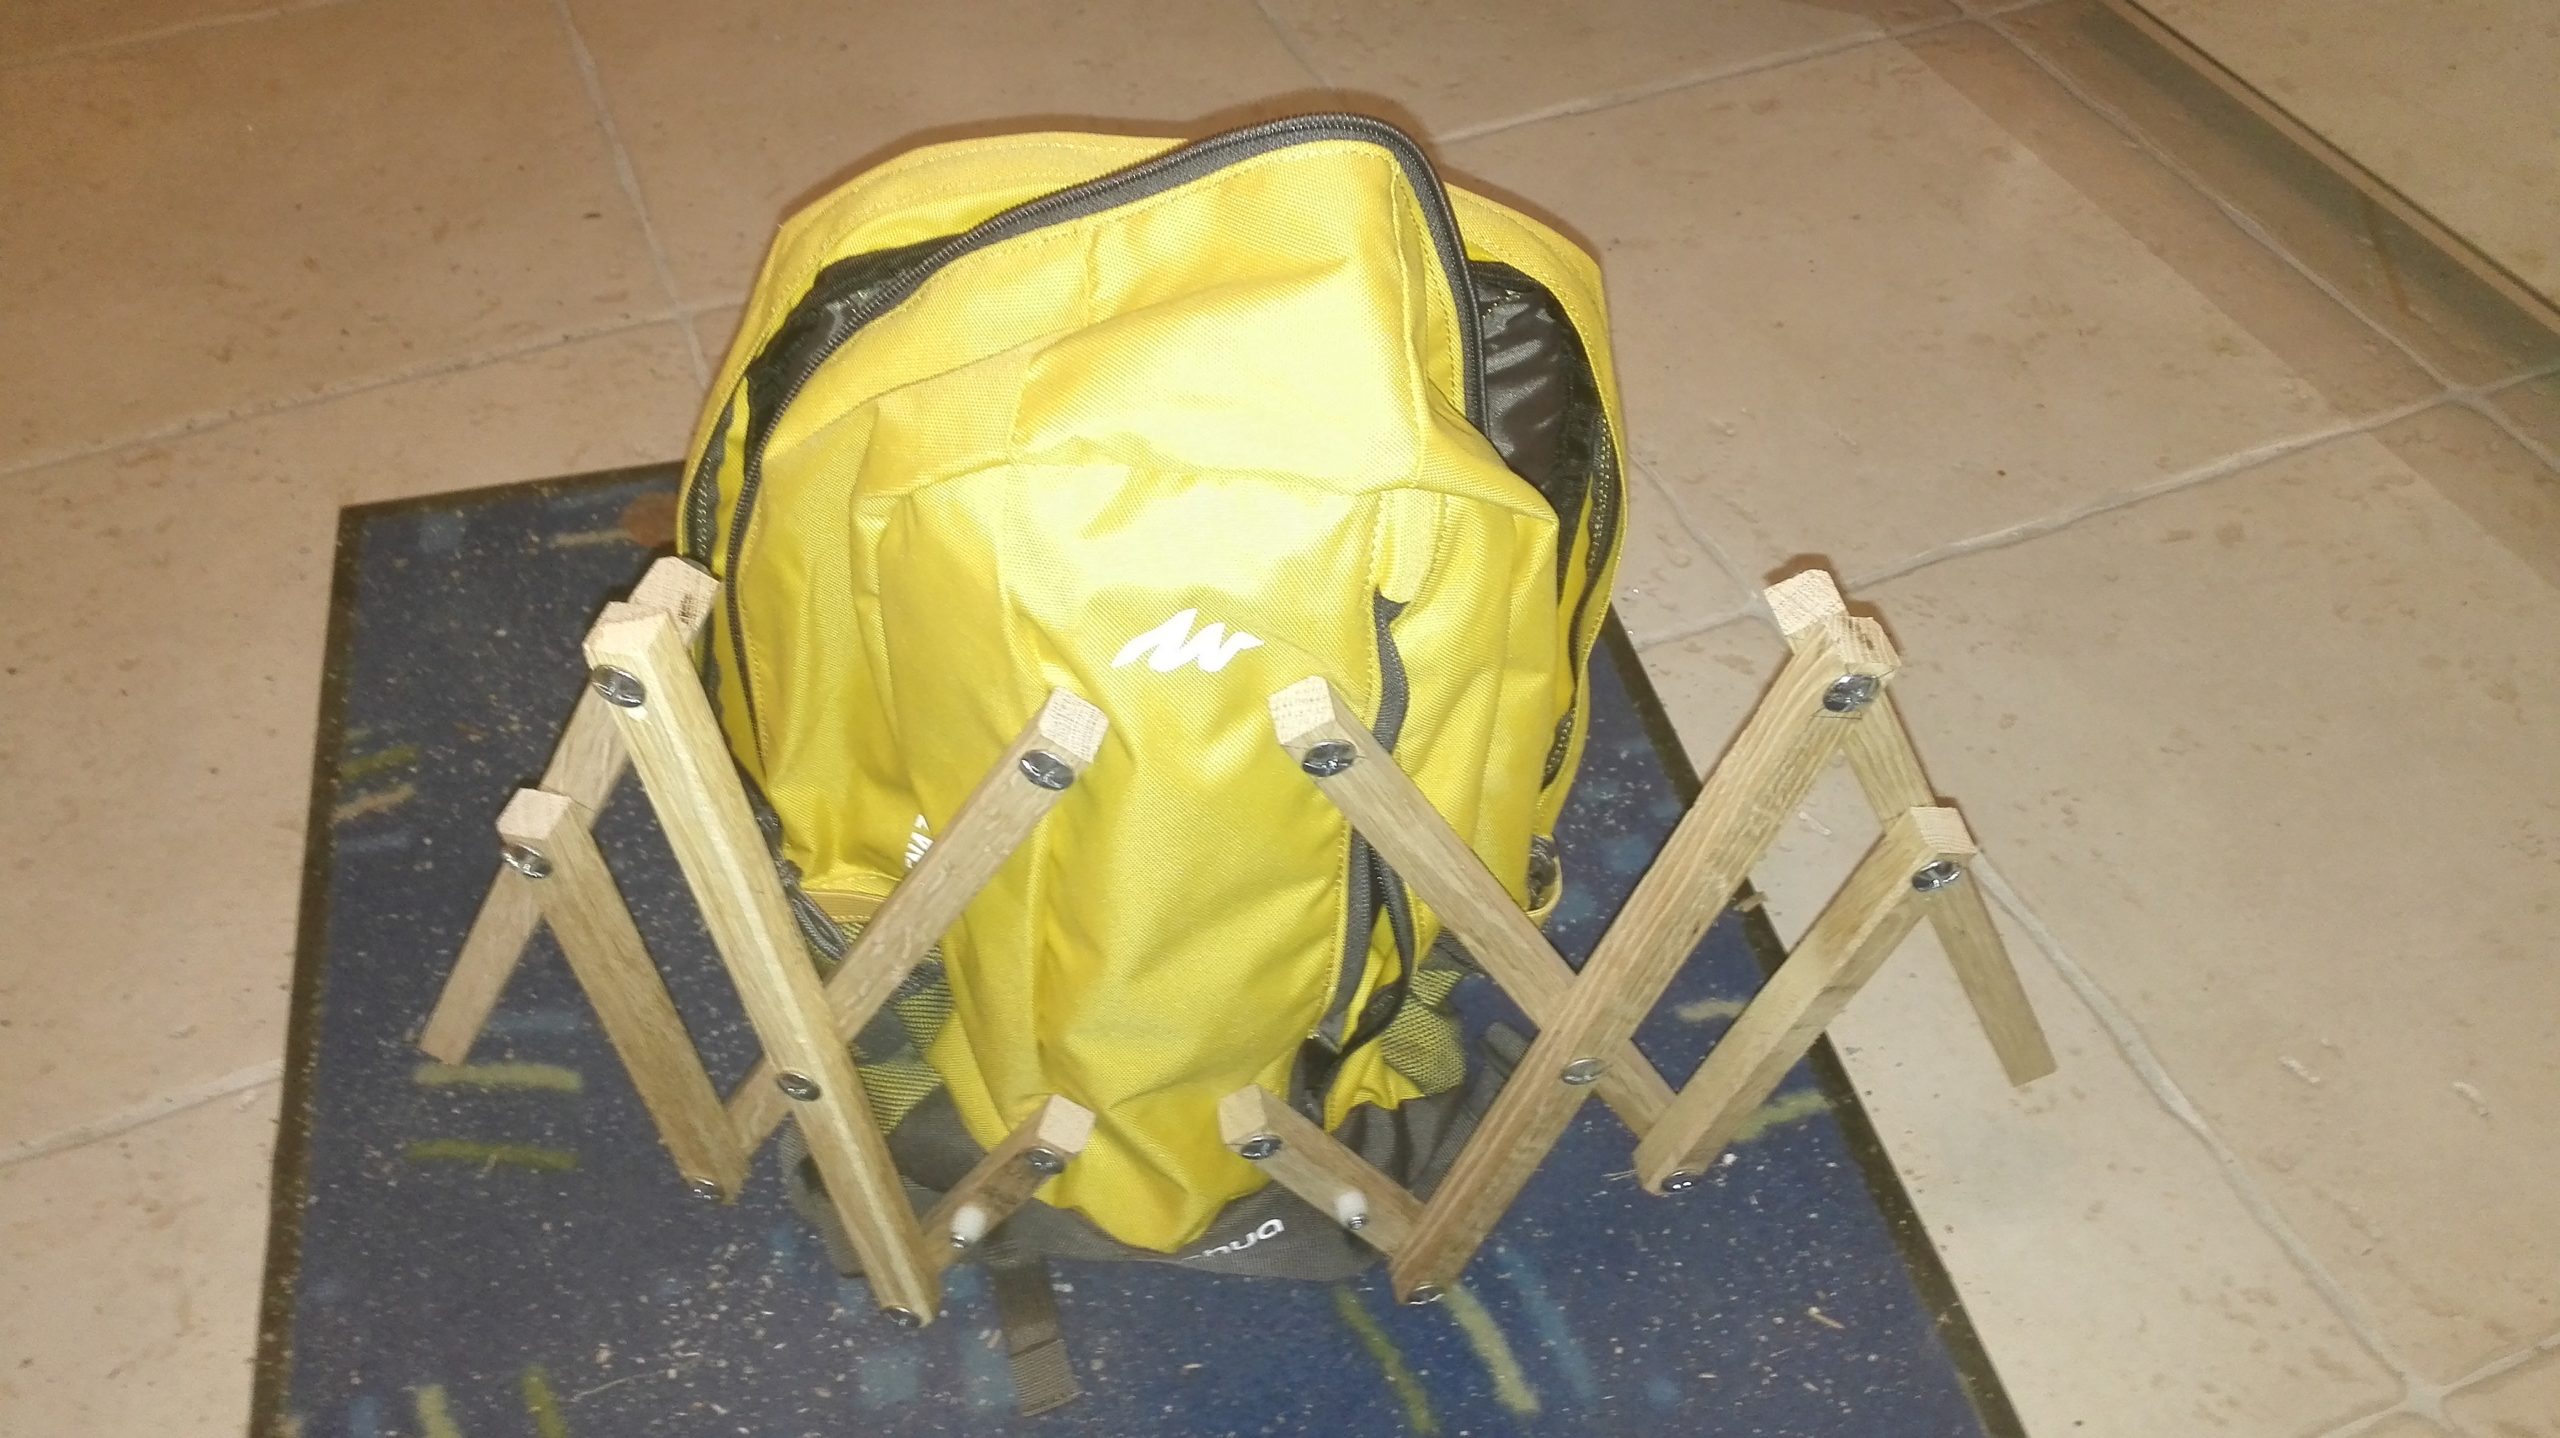
I then tried a arrangement with pieces put end-to-end, maintained parallel by doubling the middle piece.
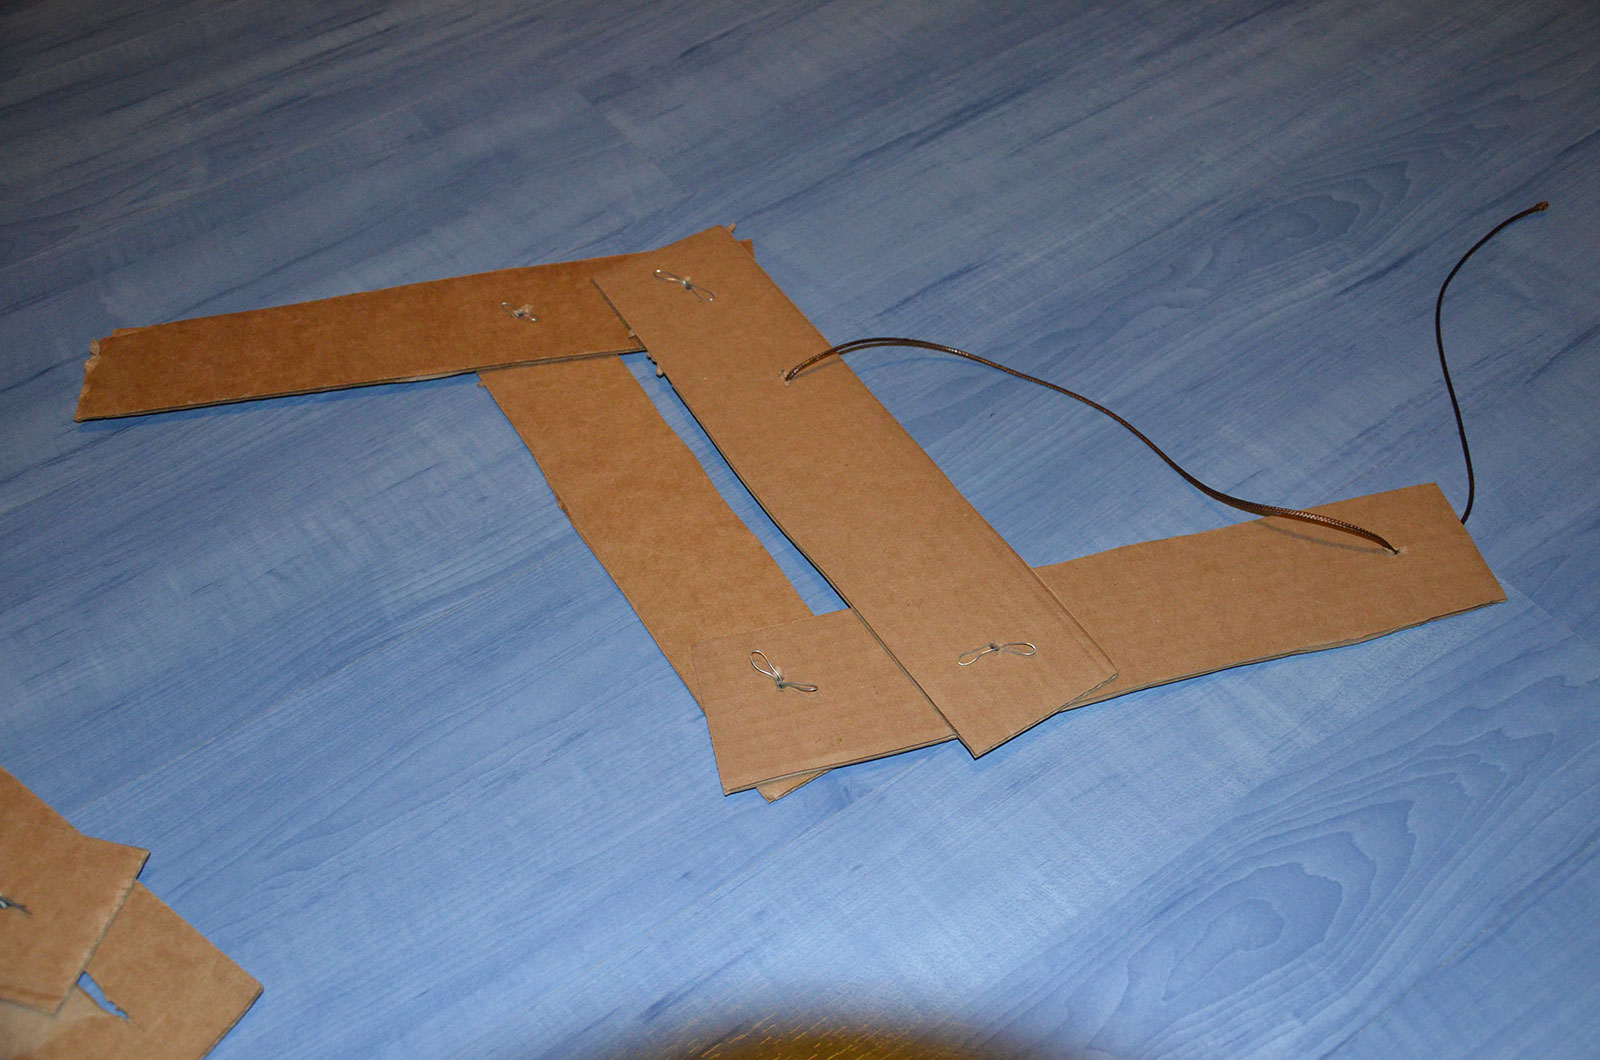
The motility is limited but good enough.
The best would have been a secondary course angle for the back and along, just information technology was also complicated to implement. And so I let the movement gratis and put simple minimum-maximum stops to set up the course (see further beneath).
I then looked for a manner to attach the feathers. There is pretty much an infinity of possibilities when tackling this step. The ane that seemed the most practical and also the almost mutual was using a wire connecting all the feather of a aforementioned row, that will let you ready precisely the angle between each of them when the fly is open (visible on Mashayahana's tutorial photo on DeviantArt).
So when the wing is at remainder, the wire is non stretched and the feathers just drop naturally toward the floor. When the mechanism is activated, the first feather, tightly stock-still to the structure will pull the wire, which will then pull on the 2d plume, which will then pull on the adjacent and so on until all the feathers of the row are unfolded.
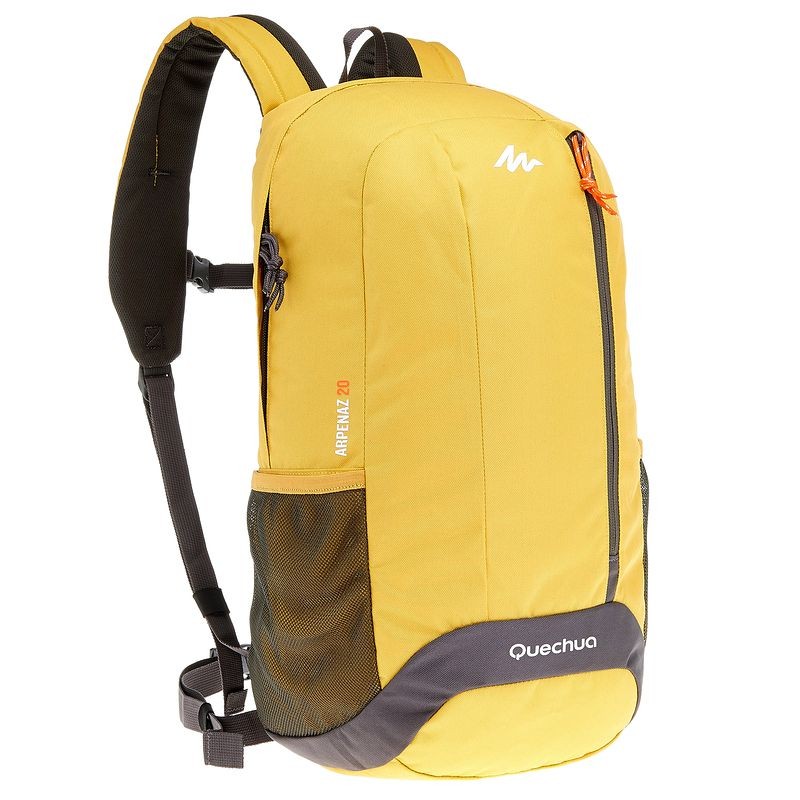
Some other question was the back anchor point. The virtually obvious solution was using a harness, or a backpack. In the end I chose a backpack that I pretty much turned into a harness…
The last trouble to solve was finding the right textile for the feathers, and how to brand them. Once once again, a lot of possibilities, from fabric to foam, even real feathers. But the cost fluctuated a lot betwixt each of them…
I went for the "foam, wood, wire, gum" solution to get a feather that is flexible and light. The painting was a bit harder to figure out because of said flexibility, but we got pretty good results using "Dip", a flexible and waterproof paint.
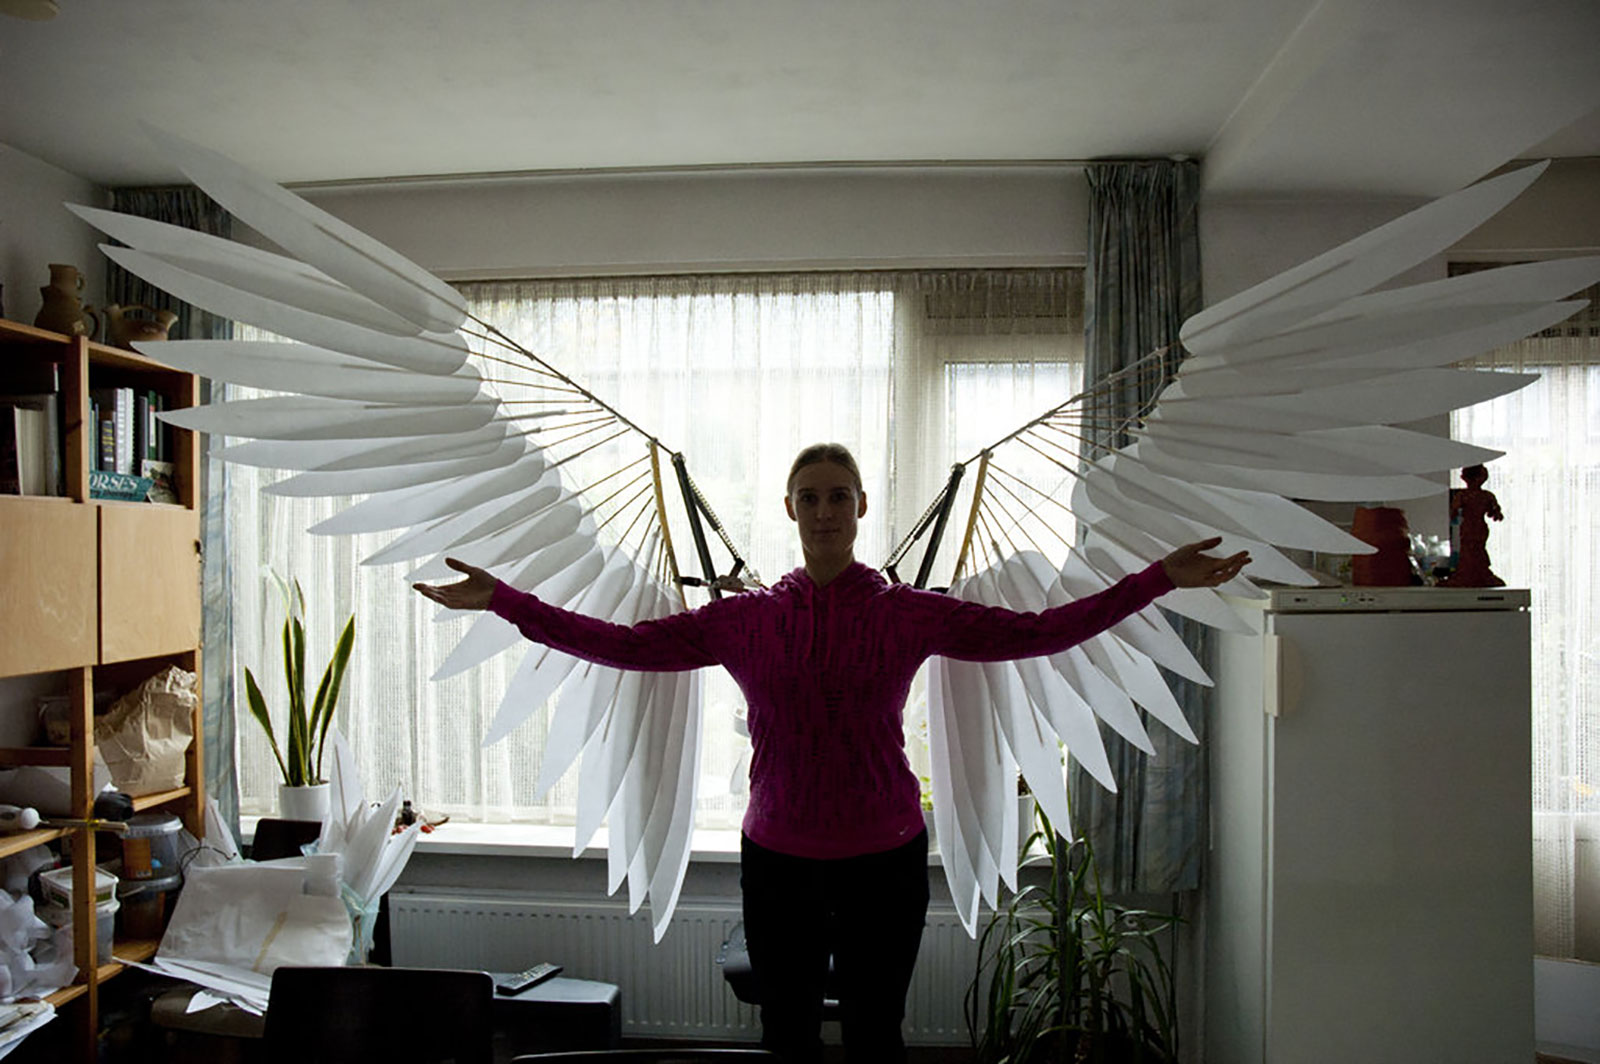
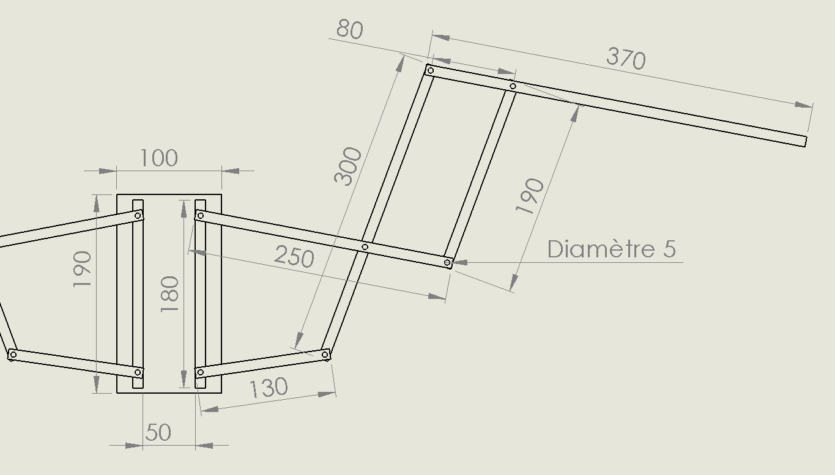
To effigy out the length of each plumage, I drew a prototype on SolidWorks in an articulated assembly. It proved quite hard to fix all the lengths right so that the wings would fold back on themselves nicely and all the same have a practiced look when they were open up.
Prototypes
The first epitome was made out of bamboo. I thought it was calorie-free, and robust enough to hold all the feathers, just it turned out to exist brittle and not very durable.

Information technology was still useful. It confirmed that the general machinery was expert. And that with some adjustments to the length of the wood pieces, the feel was the correct one.
For the backpack, it was initially supposed to keep the "carry objects" function, but when the costume was on, the width of the haversack made me wait kleptomaniacal and kinda weird. So nosotros removed the actress width, and simply cut pretty much all the pockets, since they were just useless in the end.
Building
List of necessary materials:
- 1x Pocketbook
- 4m of wood (four×4 in my case). Can be replaced by plexiglas for exemple
- 1x thin plywood plank (~5mm) for the dorsal plate
- 2x large washers with 6mm internal diameter
- 1x big washer with a big internal bore
- 20x bolts 6mm
- 20x self locked nuts 6mm
- 20x 6mm washers
- 3x small pulleys
- 40x centre shape screws
- 2x wood screws (pocket-size)
- 2x small rubber spiral spacers
- Heavy duty cord
- Hot glue
Tools
- Hot gum gun
- Drill (drill printing prefered)
- A large screwdriver
- A hacksaw
Bag
The purse was bought at a sports shop for 10€. It is basic but efficient because the straps are padded and comfortable for the shoulders, and information technology has two straps on the front for stabilization, which is very applied.
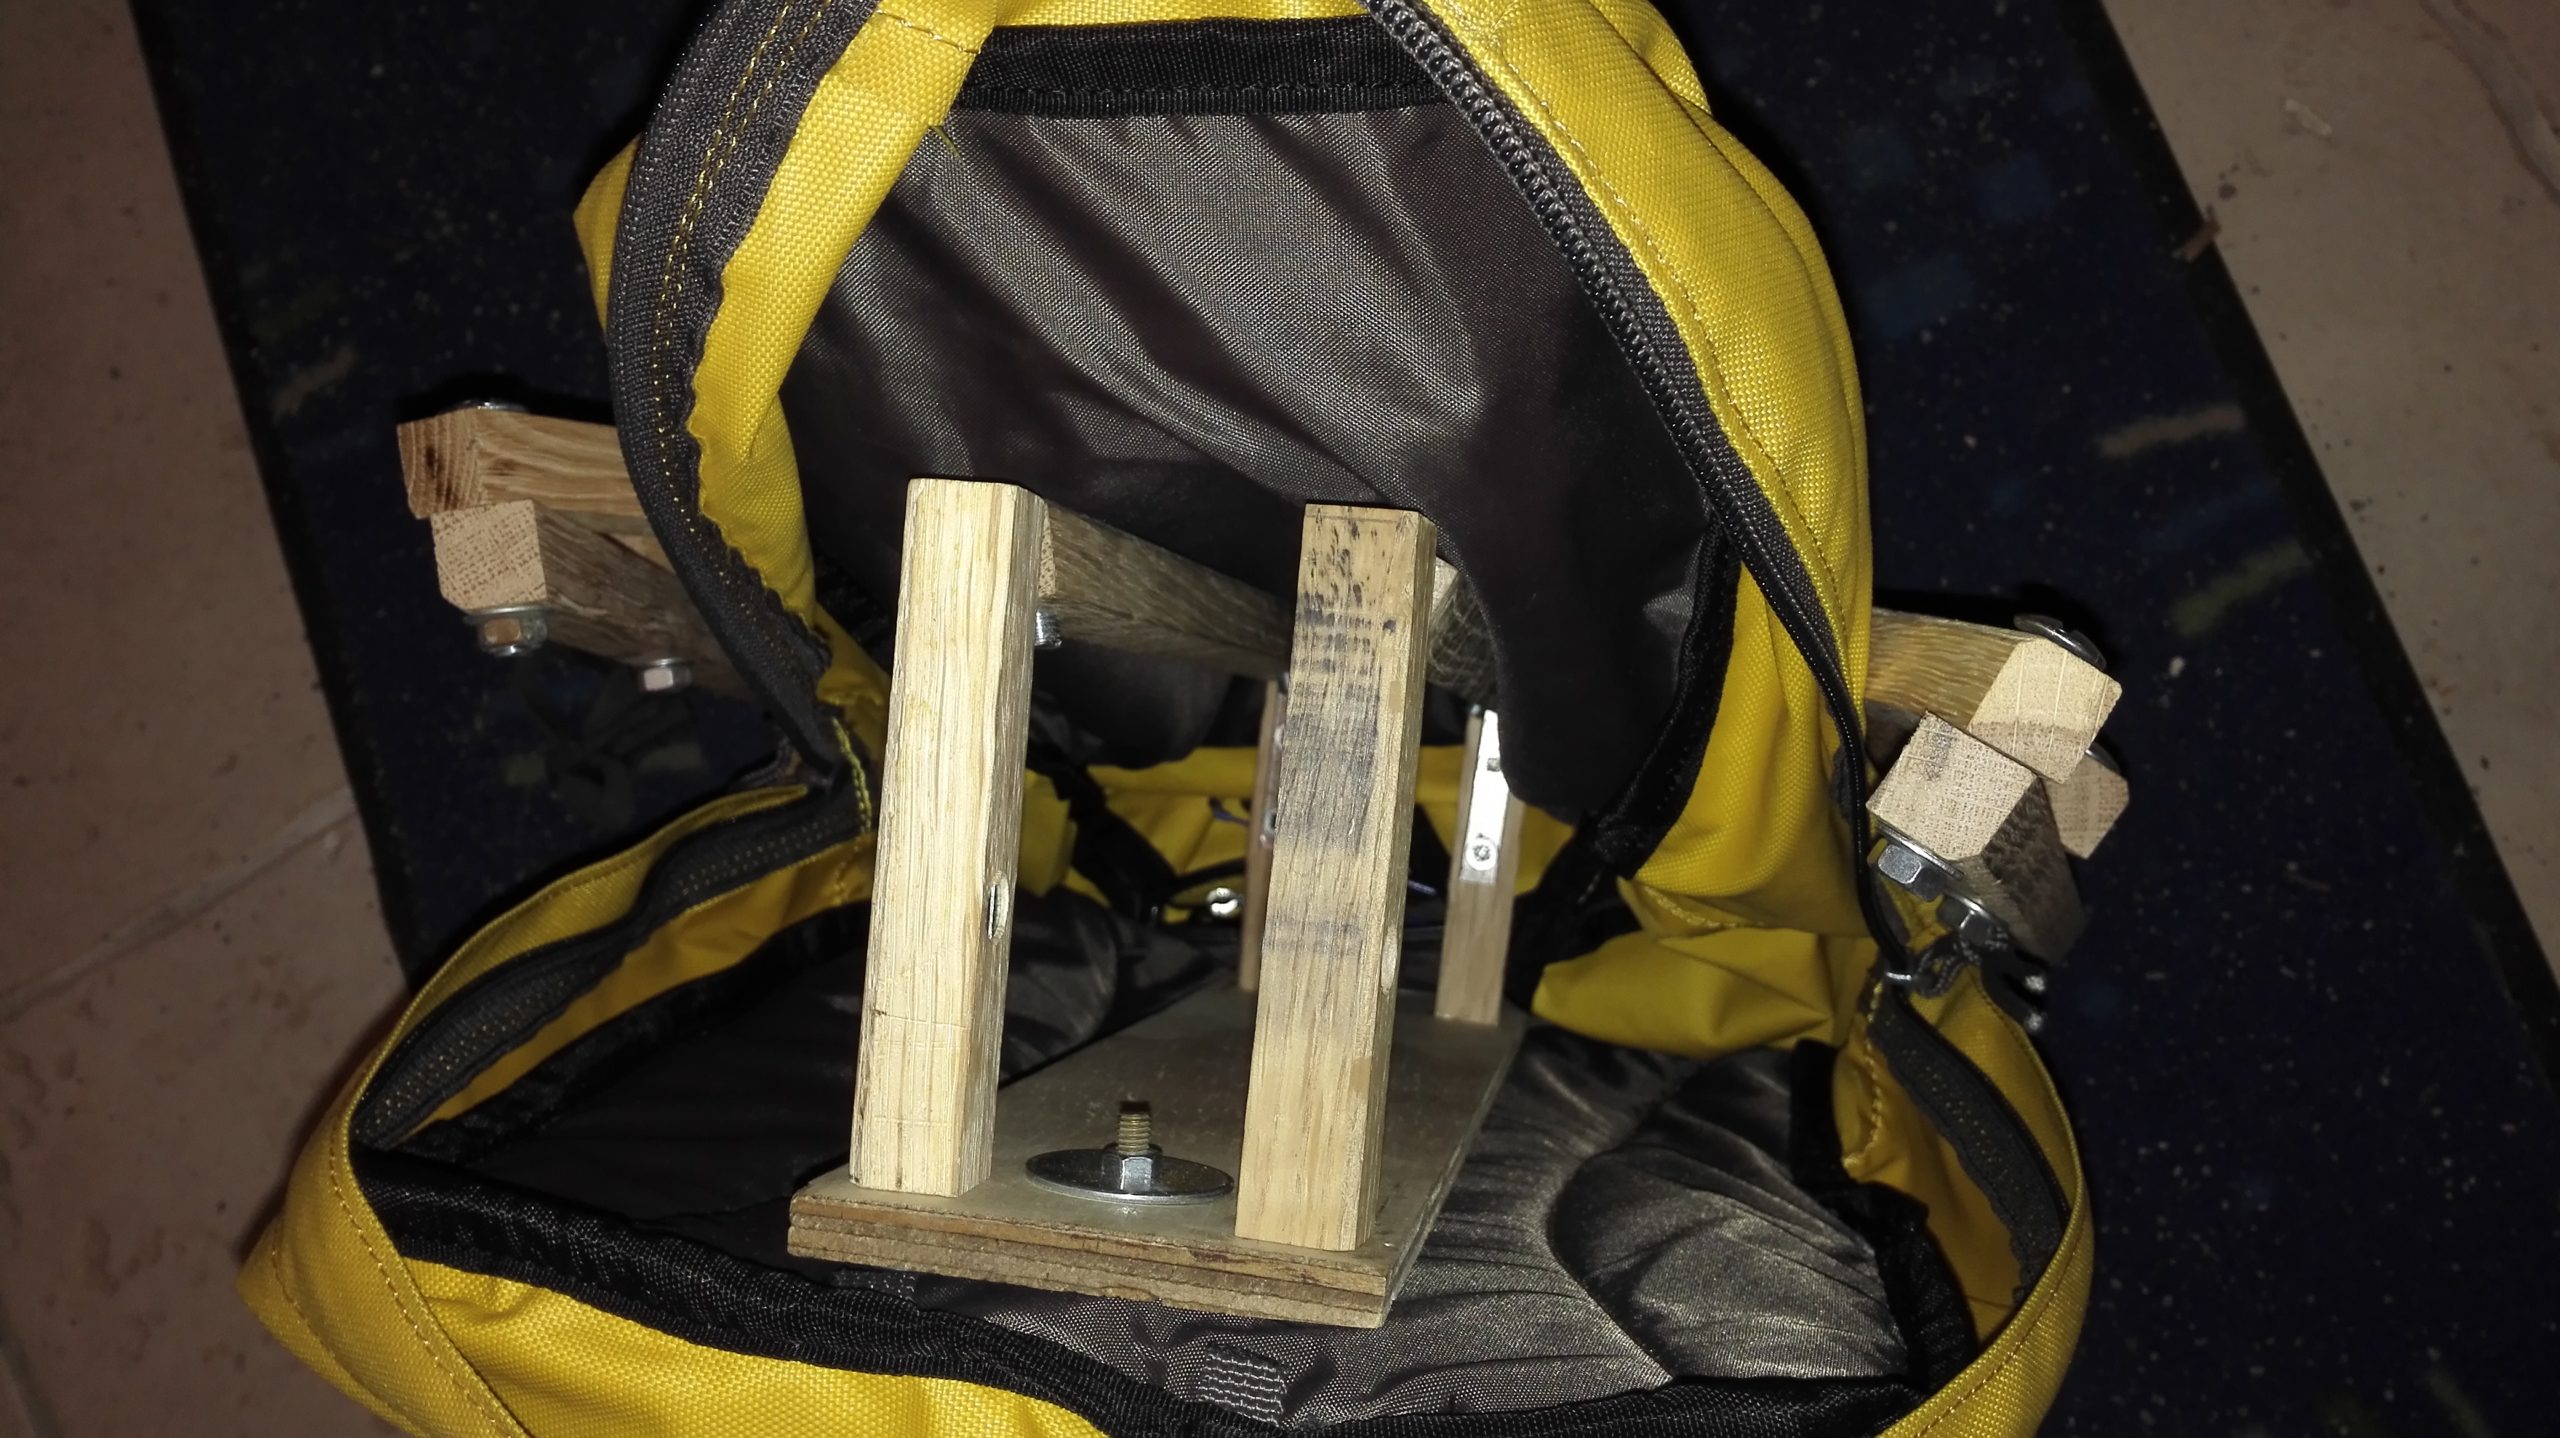
A wooden plank the same height as the pocketbook'due south is attached to the dorsum. It volition be the base of operations on which the whole wing machinery will be fastened. It is screwed in with very large washers so it doesn't tear the material.
On tiptop of the plank, two wooden cleats are screwed: 1 at the top, one at the bottom. On each of them we place two pin. Yous just take to put a wood piece between them now and they will be able to pin back and forth, just similar we saw in the "research" section.
Information technology'due south on this wood piece that the whole wing volition come on each side. So we pierce two holes in each of them.
Wings
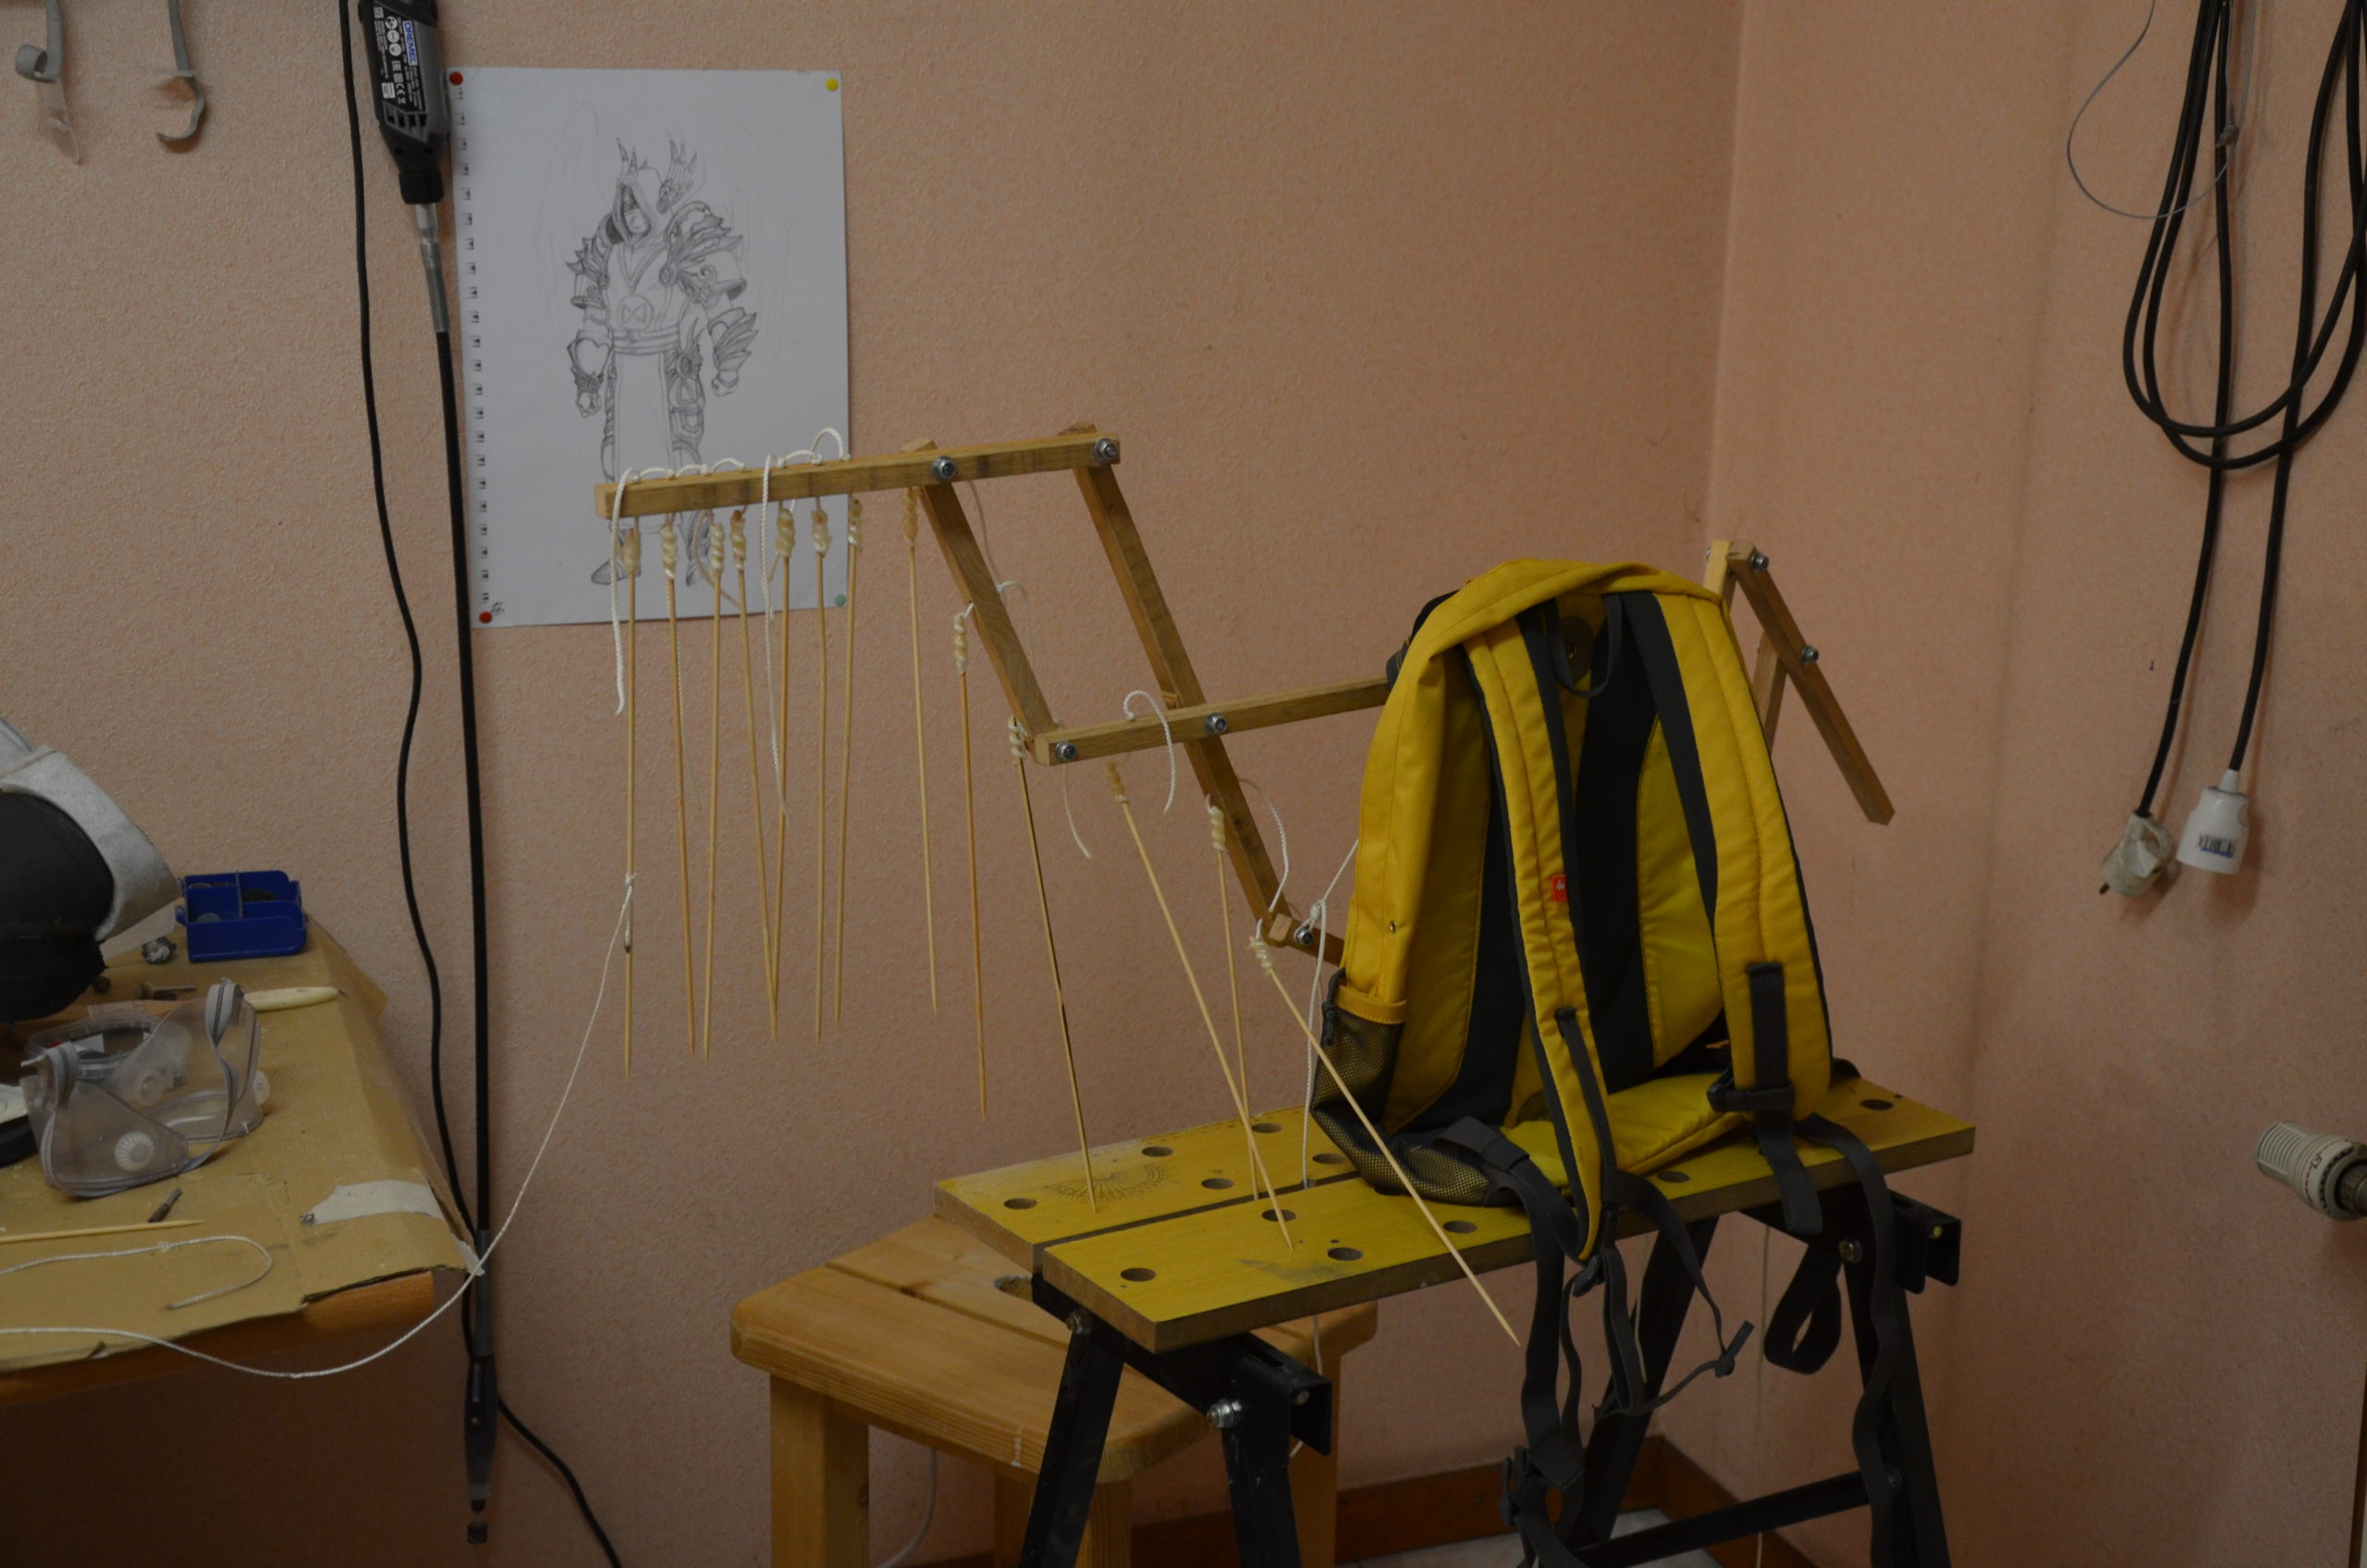
At present nosotros go for the wings. To practice this, but cut the wooden bars (in my case oak 20mm wide, very solid) to the length that has been divers on SolidWorks, drill the holes (preferably with a pillar drill for better accuracy), and assemble these pieces together with screws / washers / nuts (SWN).
The nuts must not exist tightened otherwise the unabridged mechanism is stock-still; Therefore, in society to prevent them from being unscrewed and go for a walk while you are showing off, locknuts are used, which remain in place even when they are non tightened.
Tip: if like me you are fumbling with your organisation and often have to detach / reassemble, first employ regular nuts which are much easier to screw / unscrew than the locknuts. Locknuts need to be screwed with a wrench from the beginning, which wastes a lot of time in the long run. As well, the plastic band gets damaged and becomes almost ineffective.
The wings can at present be fastened to the bag using SWNs. These screws are very long considering they will serve equally the "stops" on the wooden plate at the base of the bag and thus stop the course from the wings to the front.
Mechanism
At present that the skeleton is in identify, we will install all the mechanism to open the wings with the arm.
Three hooks are driven into the wooden cleats, 2 at the top and 1 at the bottom. There will exist a pulley attached on each, and through each a string will laissez passer.
This string is first attached to the lowest signal of the wing (a simple wooden screw is plenty), it and then passes into the caster which is on its side, and is tied to a ring. Some other cord does the aforementioned on the other side. A tertiary 1 goes from the ring and passes into the lower pulley, it then becomes the handle to unfold the wings. These two strings are therefore driven by a single handle. They must be perfectly adjusted to trigger the opening of their respective wing at the aforementioned time. The slightest shift volition be felt when pulling the cord by an unpleasant jerk.
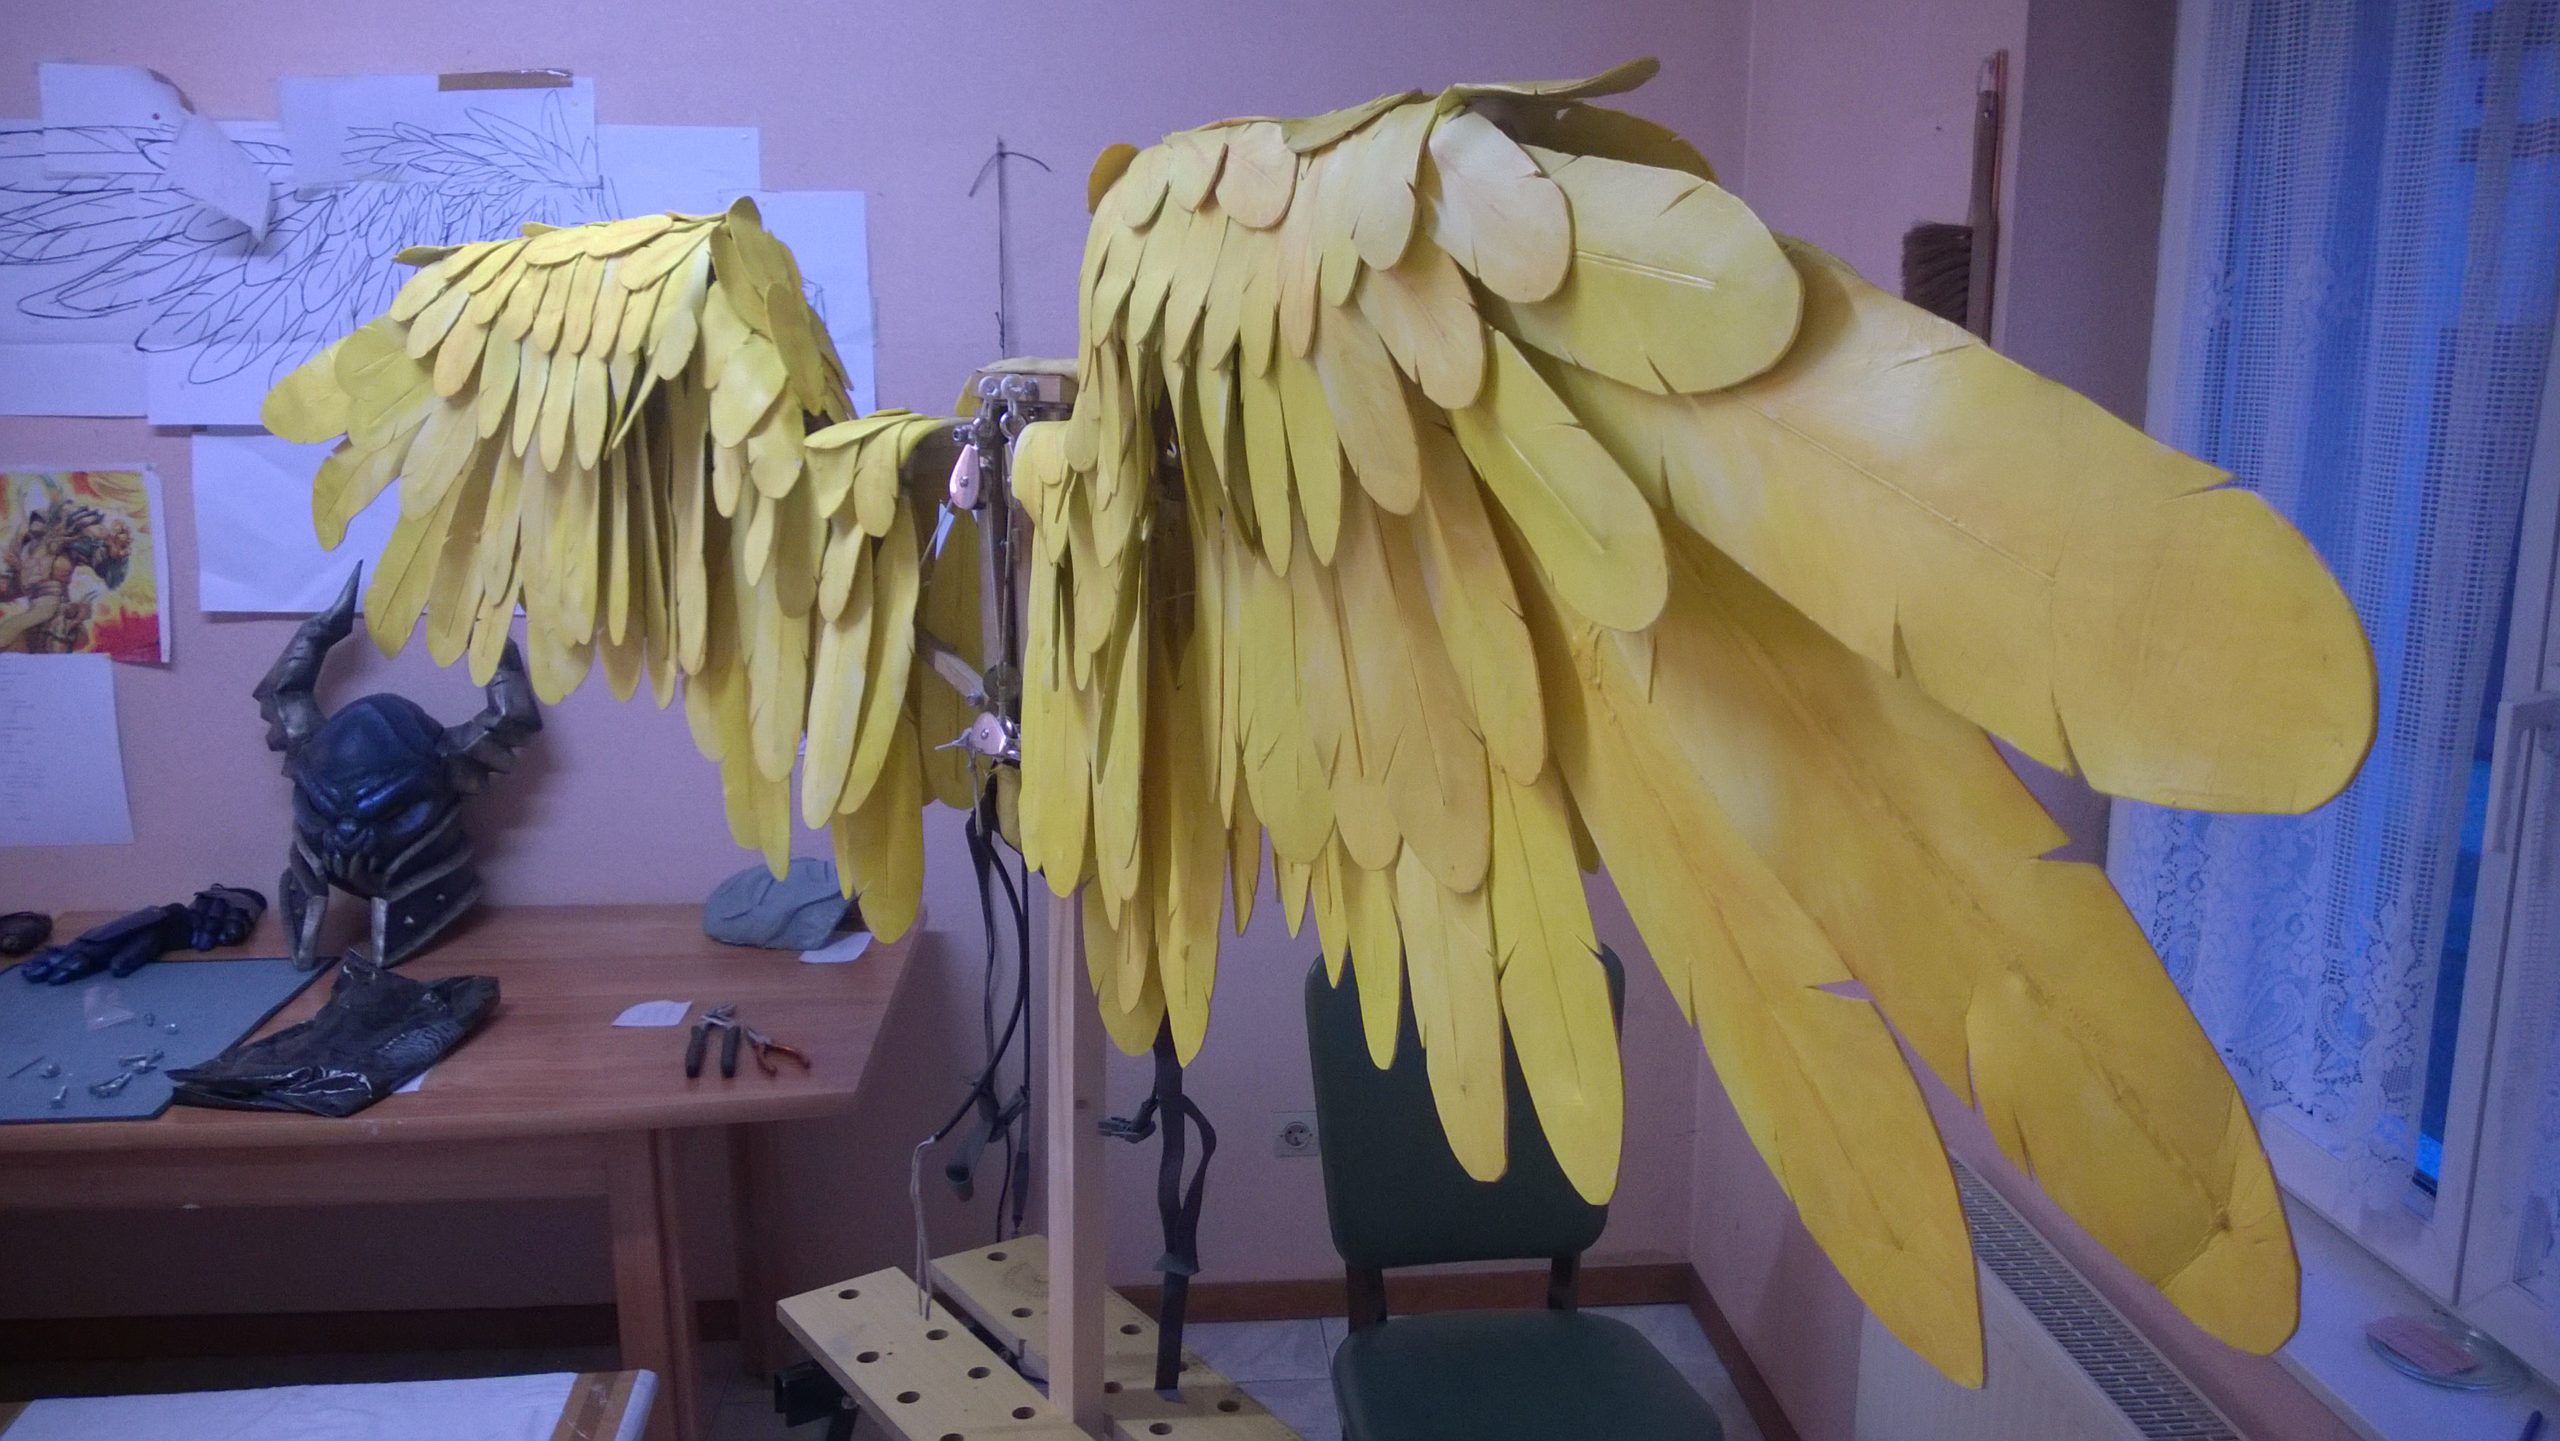
Good, our wing bag is at present functional. Nosotros must now set up him to receive our innumerable feathers. They are arranged in superimposed rows, with the main row in the eye, surrounded by two secondary rows, one on each side.

For the main row, xiv holes are drilled vertically into the wooden skeleton, 1 for each plumage, uniformly distributed along the wing.
For the secondary rows it'southward a petty different. The mechanism being on two layers of wood, I hooked laterally to shift the base of operations of the feathers when necessary. Otherwise, I used uncomplicated wood screws. Again, it is necessary to distribute the holes along the length of the wing and to exist symmetrical.
The bag is gear up to receive the feathers, which will institute our next step and is besides the most tedious part.
Feathers
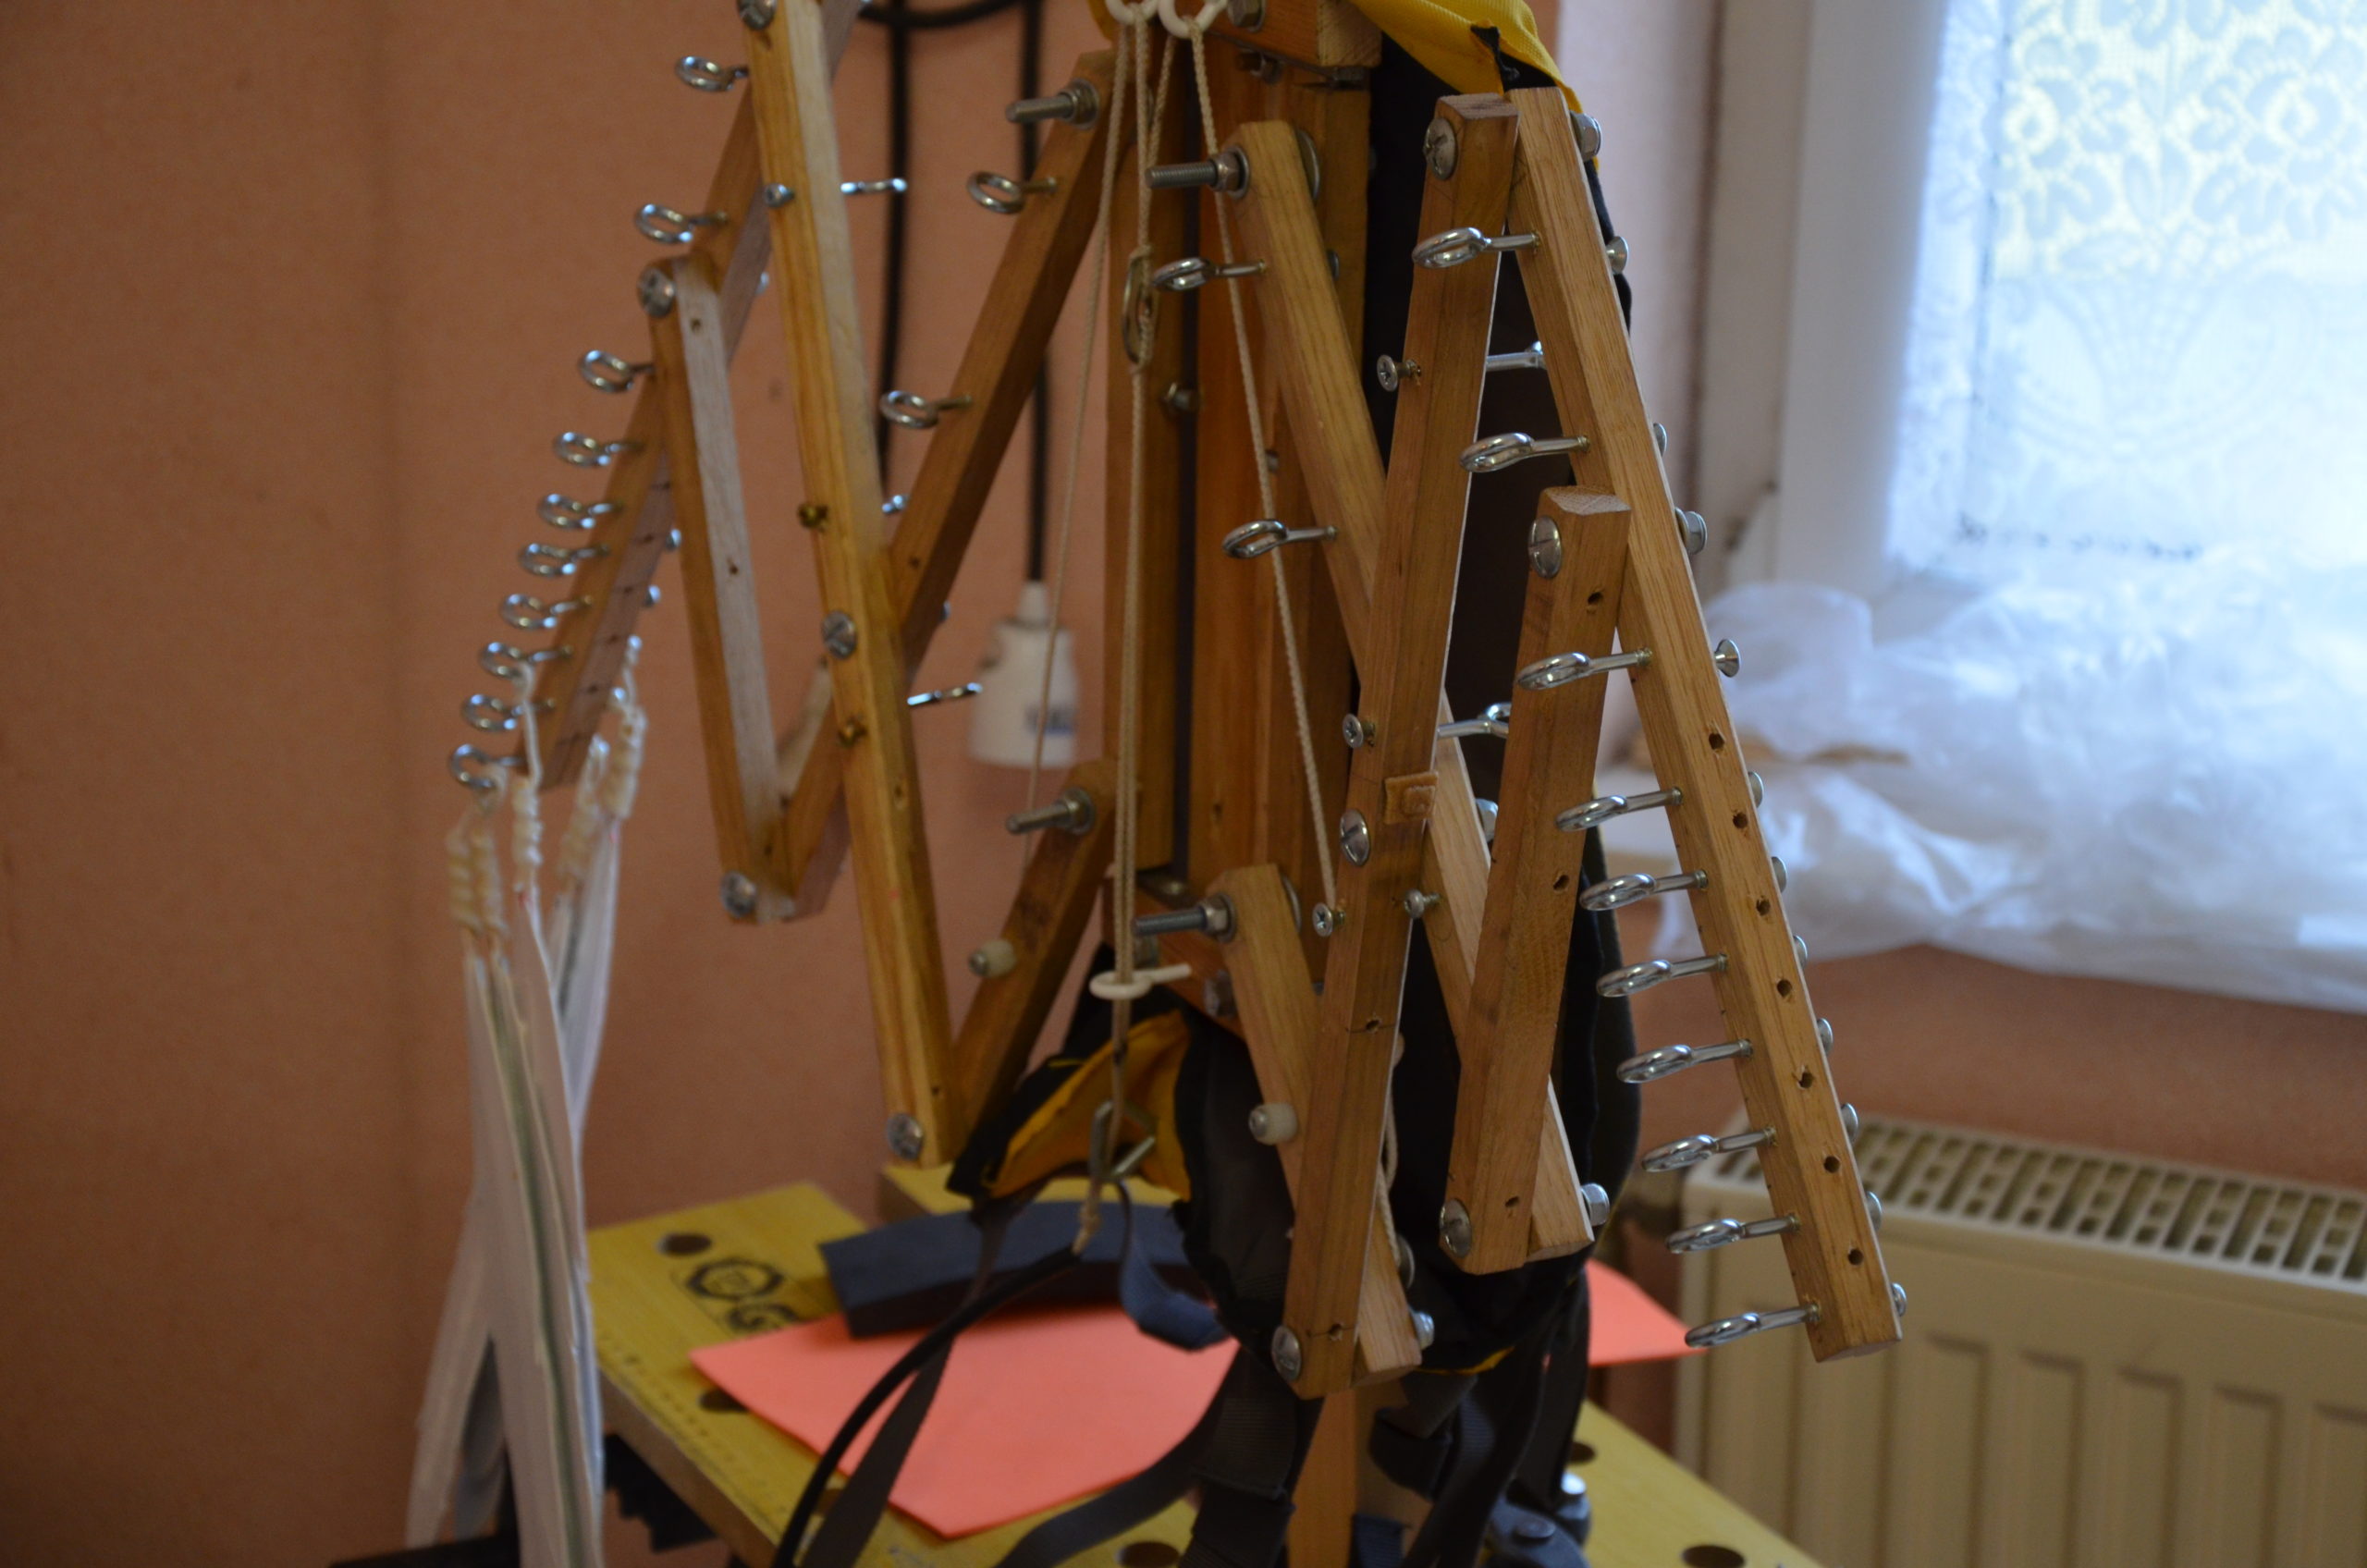
What y'all need:
- Foam Sheets
- 30cm wood skewers
- Hot glue
- Heavy duty string
- Plasti DIP undercoating
- Acrylic pigment
For the fabric I decided to use foam sheets considering it is inexpensive, easy to work with and quite rigid.
I cut a sail of cream to the right size. I and so cut a column of nearly 2mm in its center to put the wooden skewer in as the central centrality for the feather.
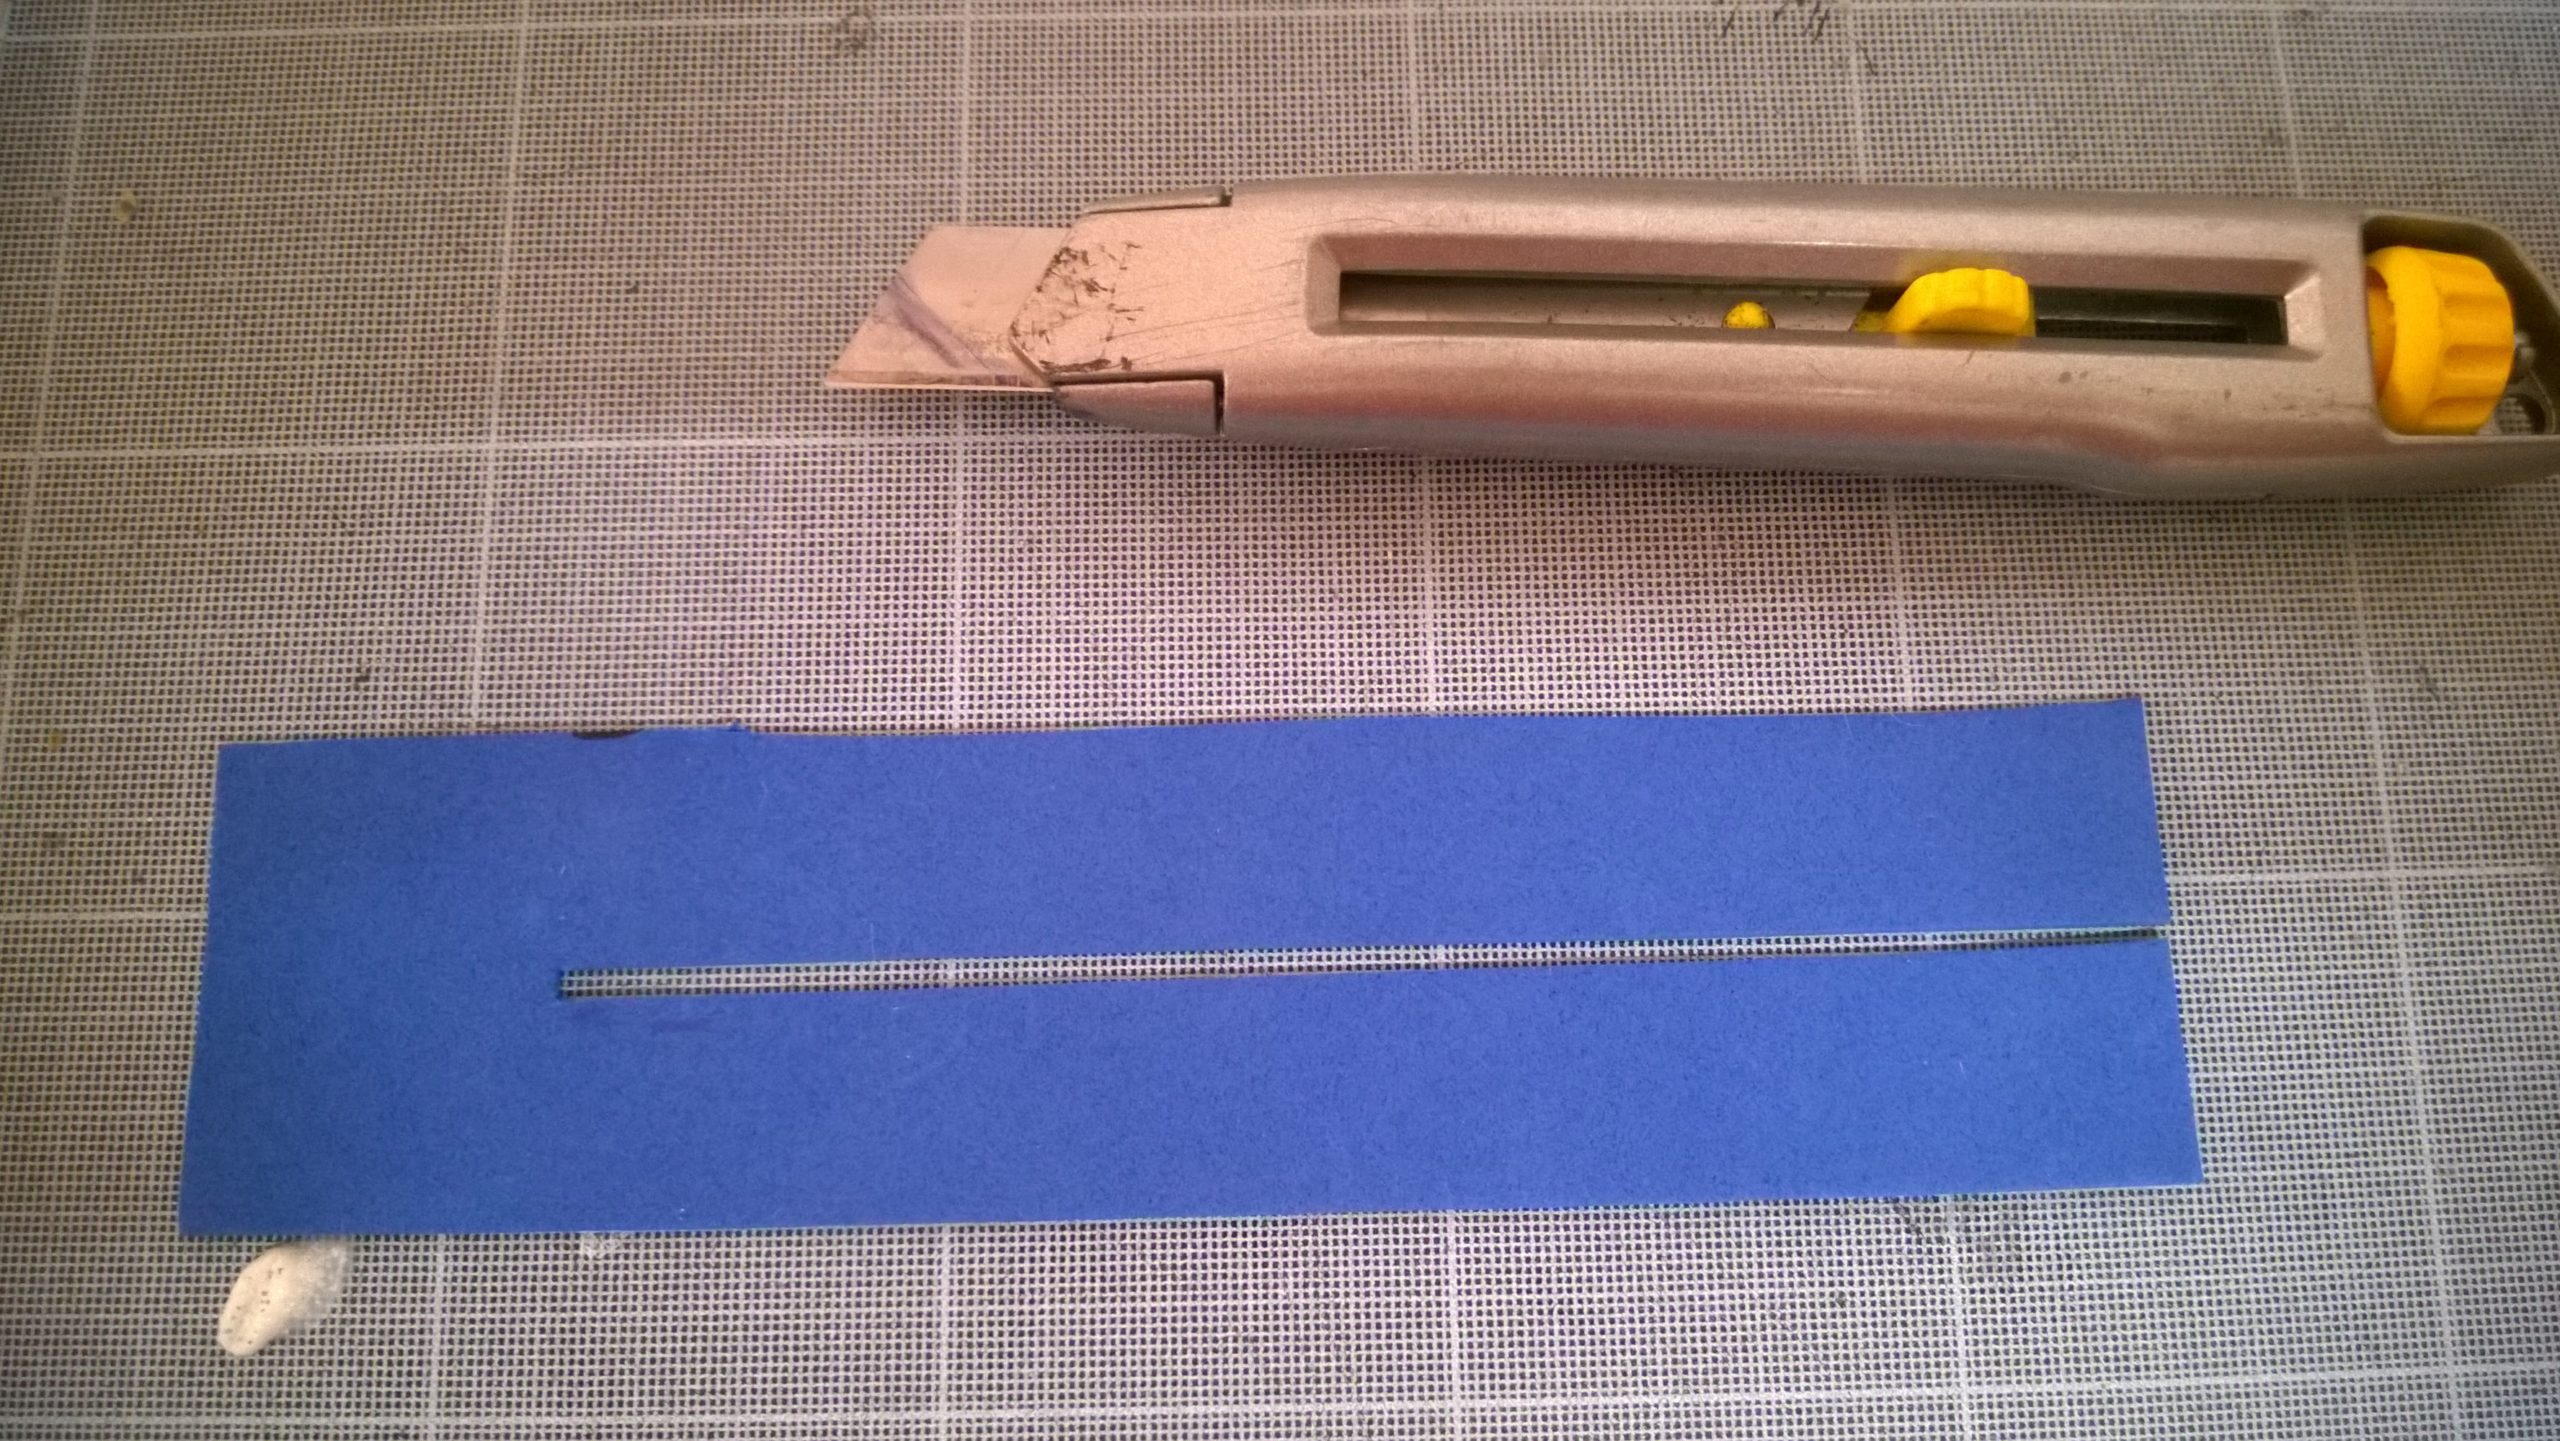
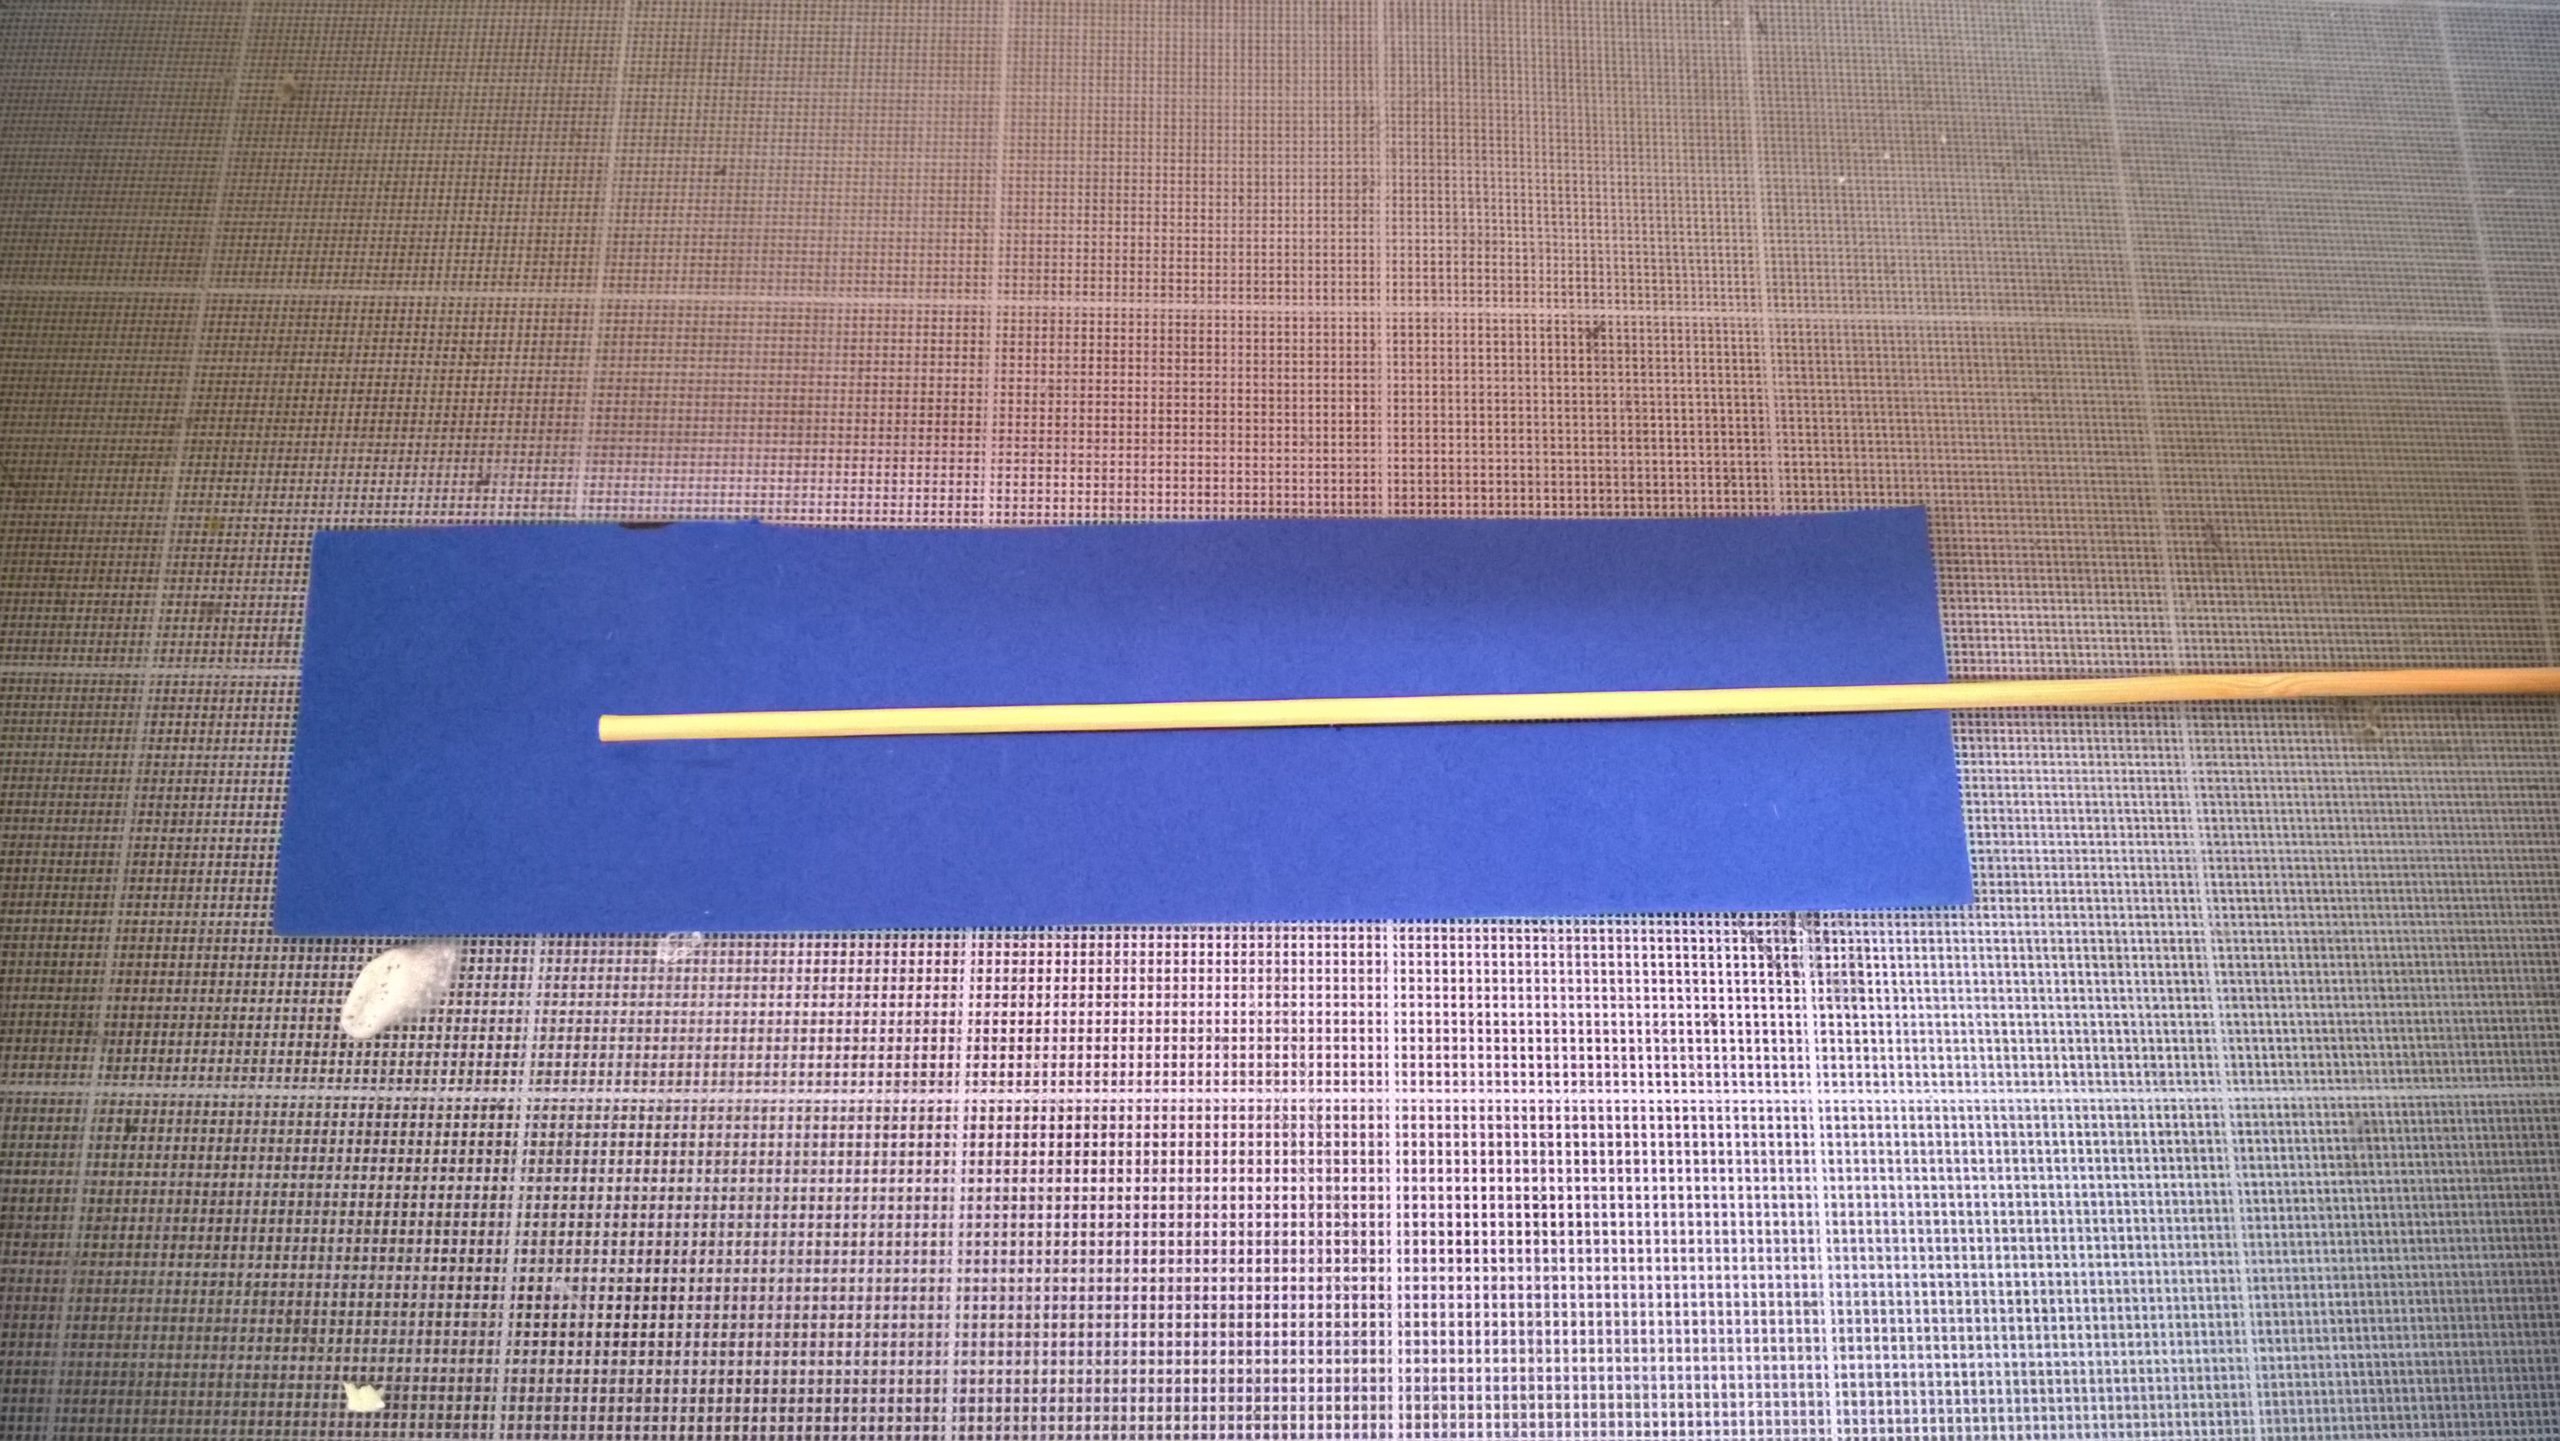
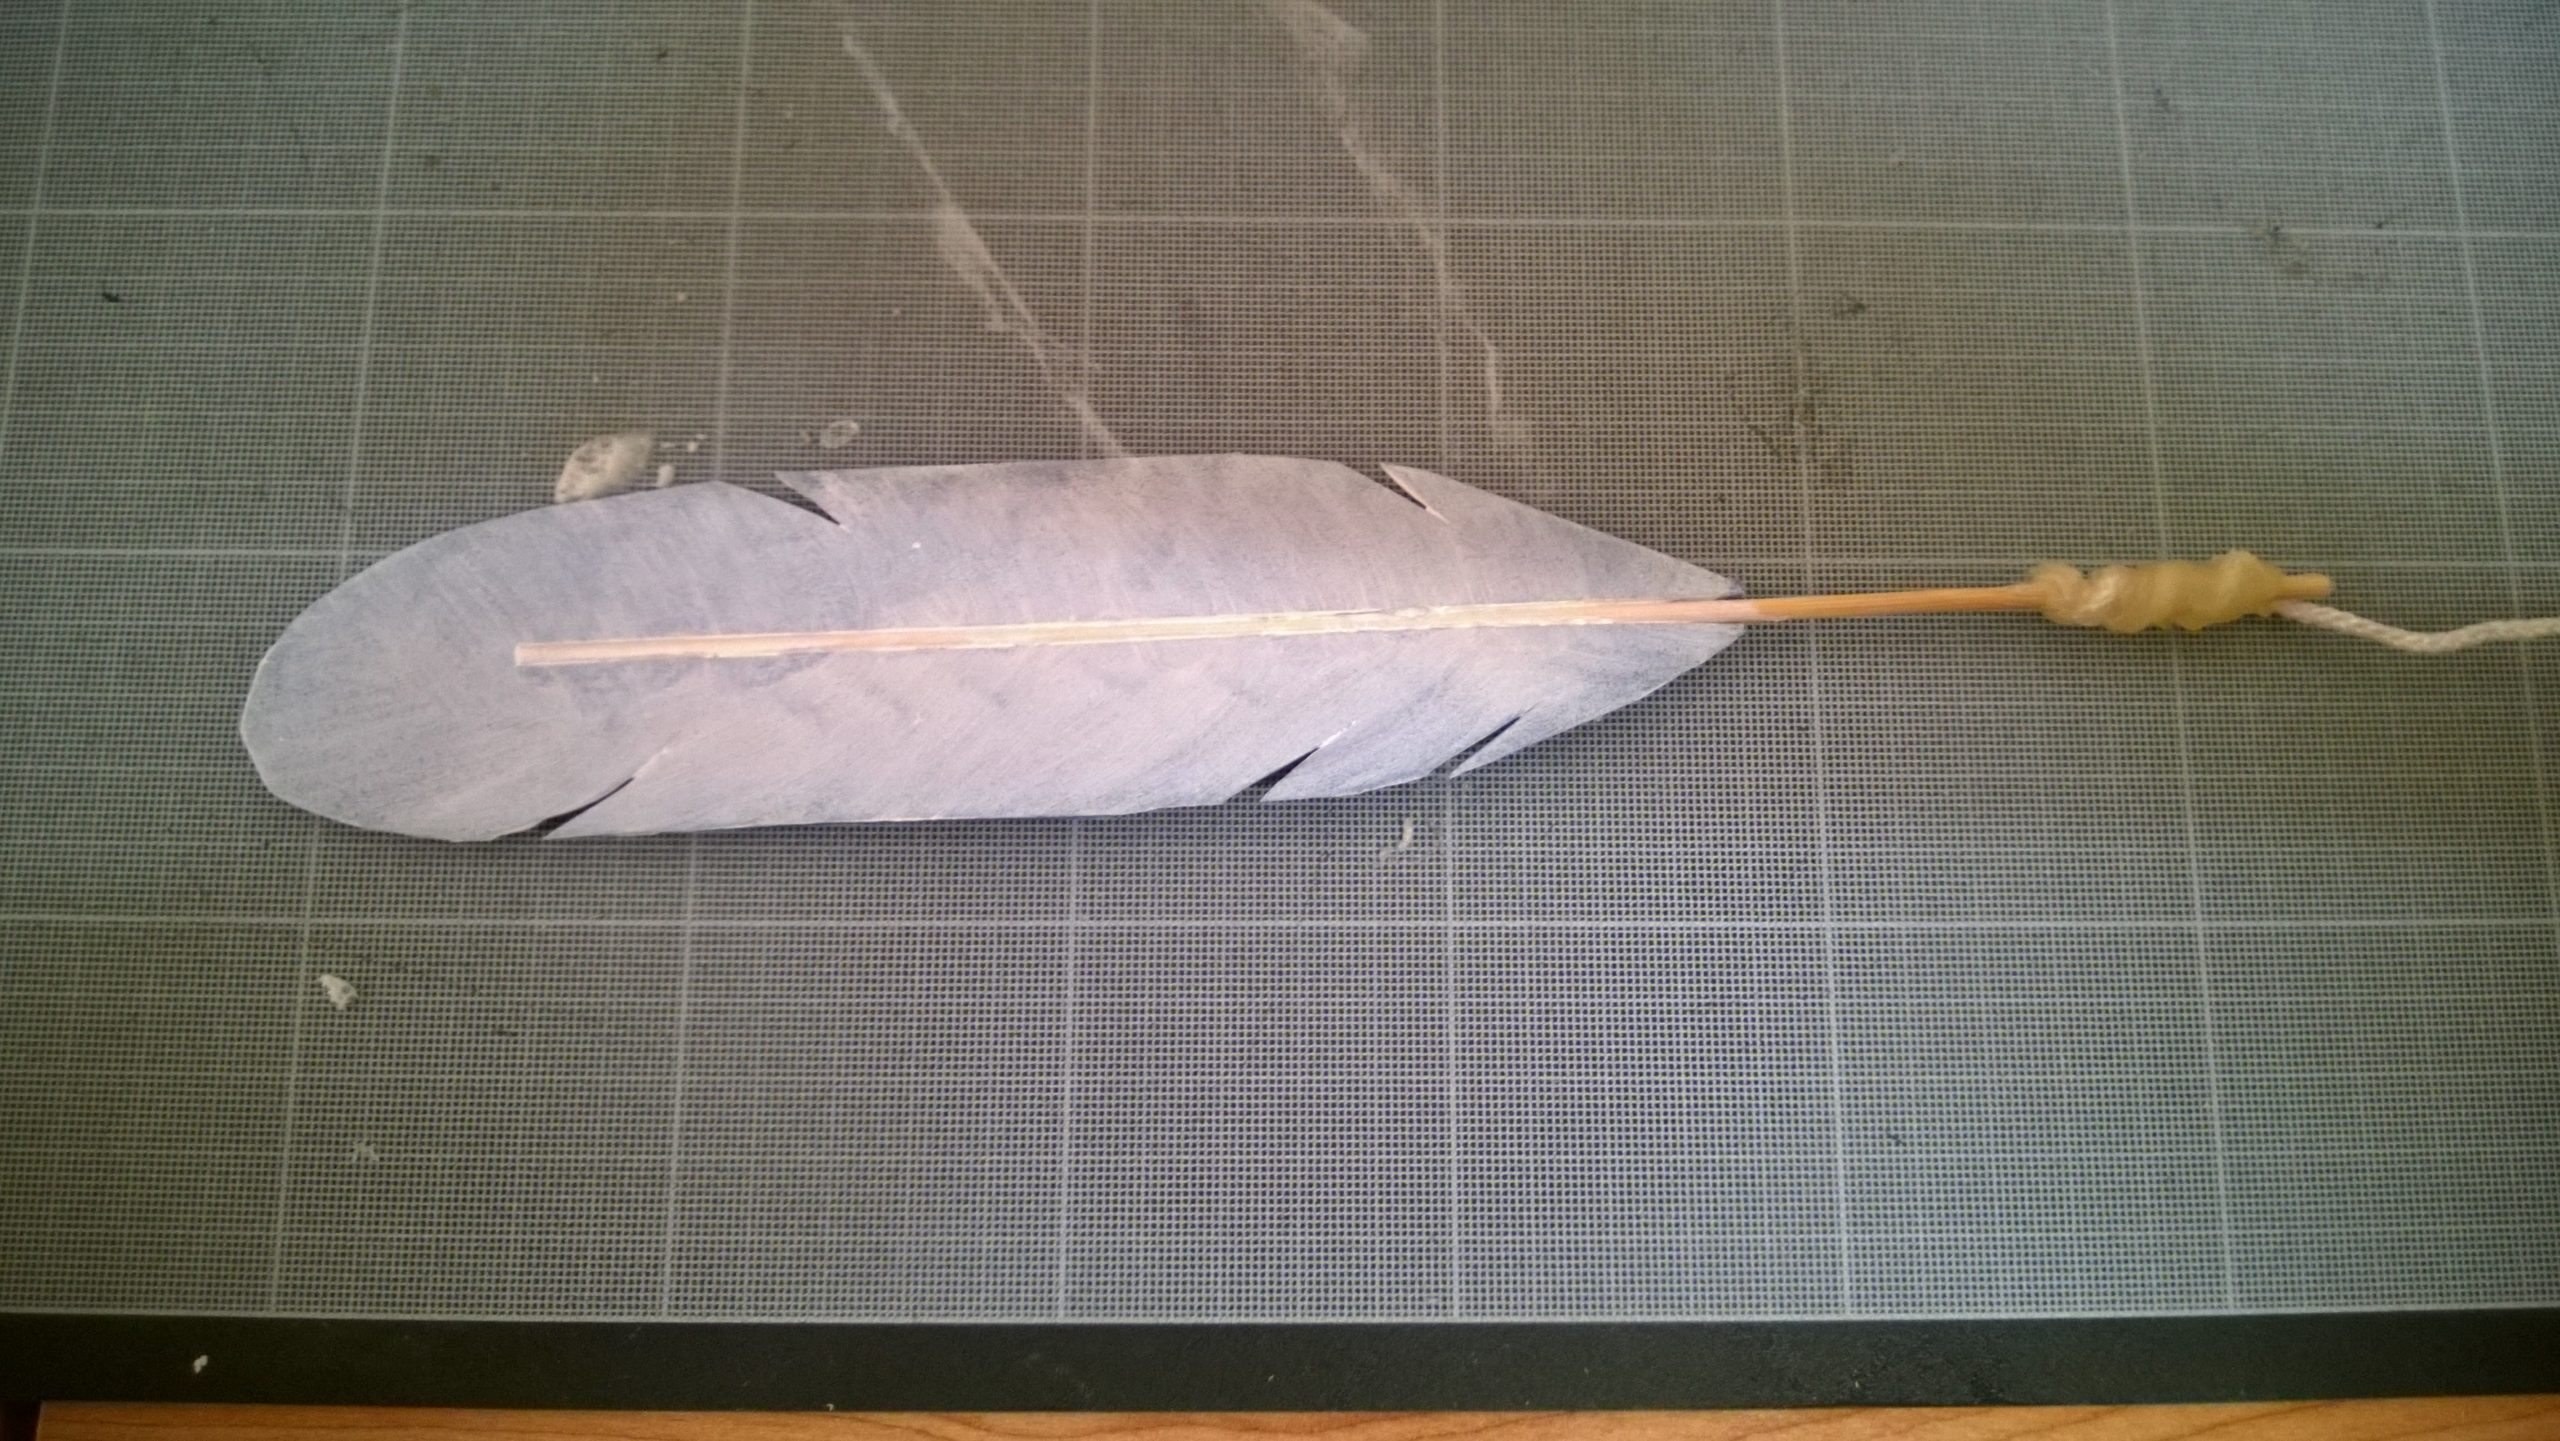
All that remains is to fix the string past wrapping it around the skewer and pouring a proficient amount of gum over it.

To the painting at present; Just apply two coats of flexible paint (to avoid cracking when the feathers twist) then two layers of classic paint the color you desire.
At present repeat the process a hundred times.
Assembly
backpack. Information technology volition be easier to put the feathers on the wings then. It is plenty to fix them with two SWNs, past the holes of the two ends of wood.
To go along the wings open up, you can tighten both SWNs temporarily.
The longest task at present is to fix the feathers well, and for the threads connecting each row of feathers, I must say it is all in how you feel information technology. You have to cull the angle that you call up looks best betwixt each feather so you will accept a harmonious outcome at the end. To avoid this thread from moving along the skewer, I put a point of hot glue each time.
In one case each wing is assembled, the mechanisms must exist hidden. This I fabricated non removable: big sheets of rounded cream, over the whole, fixed with hot mucilage once again. So be sure that your mechanism works great!

On this sheet of white foam are fixed the non-articulated feathers, those do not require likewise much attempt: a practiced amount of glue and it is done. But be careful to adjust the position and the angle to keep the effect!
Now connect the two strings of the handbag to the bottom of the artillery of each fly and your wings are finished!
Improvements
Although the mechanism is generally potent and functional, there are still some improvements that could exist fabricated:
- Some feathers near the joints remain trapped during the folding of the wings and are therefore damaged by using the pocketbook repeatedly.
- I think a more rigid fixation of the feathers would allow a better movement of the wings and less likely to forbid the feathers from returning to the right place.
- Speaking of the feathers, I would propose yous to employ foam sheets of a color shut to your desired color. Because fifty-fifty if I accept tripled the layer of "Dip", the cracks are inevitable and get visible when it is bright pinkish that comes out only underneath!
- If you have the necessary resources and / or motivation, information technology would be interesting to look again at the opening movement, because I retrieve the event could be improved, with a render even closer to a natural fly.
Materials and tools used :
Matérials
- Backpack -
- Wood and plywood -
- Bolts and nuts - https://amzn.to/2QEKBcB
- Washers - https://amzn.to/2P0RQee
- Cocky locked basics - https://amzn.to/3n0T05Y
- Small pulleys - https://amzn.to/3n29XgH
- Eye shape screws - https://amzn.to/3n8oeIz
- Wood screws - https://amzn.to/3x8EvSs
- Rubber screw spacers - https://amzn.to/3dv9pfP
- Heavy duty string - https://amzn.to/3v4DDwo
- Hot glue - https://amzn.to/3dsTGhw
- Foam sheets - https://amzn.to/3gph1me
- Forest skewers - https://amzn.to/3ejm5pg
- Plasti DIP undercoating - https://amzn.to/2ROvGx1
- Acrylic paint - https://amzn.to/32wx1KZ
Tools
- Hot glue gun - https://amzn.to/3sG2e9j
- Hacksaw - https://amzn.to/3aqTRrP
- Drill printing - https://amzn.to/3goiIQE
- Screwdrivers - https://amzn.to/3x5ipQK
Source: https://www.blackowlstudio.com/en/tutorial-crafting-articulated-wings/
0 Response to "How to Make Articulated Angel Wings Easy"
Enregistrer un commentaire